
Here’s a detailed guide on How to Propagate Pilea Plants Easily with every method explained in detail to help you out!
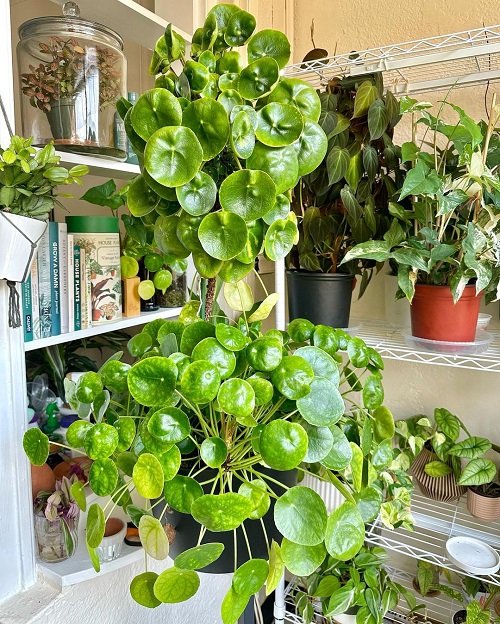
Pilea is a genus consisting of about 600 species of flowering plants in the nettle family, Urticaceae. They’re often grown as houseplants due to their attractive leaves. There are several methods to Propagate Pilea Plants and we will discuss them in detail.
Here are the Most Beautiful Hanging Pilea Plants
Best Time to Propagate Pilea Plants
Pilea plantsc an be propagated throughout the year if grown indoors, as this plant prefers stable indoor temperatures between 60°F and 75°F (15°C to 24°C). The best timing to Propagate Pilea Plants can vary depending on the USDA zones:
- In USDA zones 10-11, where frost is not a concern, Pilea can be propagated outdoors almost any time of the year, although the growth rate might slow down in the winter months due to reduced daylight hours.
- In USDA zones 8-9, Pilea should be propagated in late spring through early fall. In these zones, the plant will need to be moved indoors or adequately protected from winter temperatures.
- In USDA zones 6-7, it’s best to propagate Pilea in late spring through mid-summer so the plants have plenty of time to establish before winter.
- In USDA zones 1-5, Pilea should ideally be grown indoors because the outdoor temperatures are usually too cold for this plant. Thus, propagation can happen any time of the year indoors.
Here is How to Identify and Save Overwatered Pilea
Different Ways to Propagate Pilea Plants
1. Division

This method works well for mature pilea plants that have grown too large for their pots.
- Step 1: Gently remove the plant from its pot, ensuring you do not damage the root system.
- Step 2: Using a clean knife, divide the root ball into two or more sections, making sure each division has an equal share of roots and shoots.
- Step 3: Repot the divisions into fresh potting mix, watering thoroughly after potting.
2. Leaf Cuttings
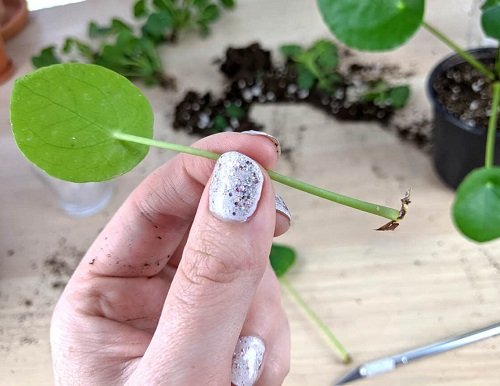
Although this method is not as effective for all species of pilea, it’s worth trying.
- Step 1: Cut a healthy leaf with a little bit of stem attached.
- Step 2: Allow the cutting to dry for a day to prevent rotting when planted.
- Step 3: Plant the cut end of the leaf into a container filled with fresh potting mix, ensuring the leaf itself is above the soil surface.
- Step 4: Place in a warm area with bright, indirect light and keep the soil moist.
Read about Pilea peperomioides Care here
3. Stem Cuttings

- Step 1: Cut a healthy stem from the plant using a sharp, clean knife or scissors. The cutting should be around 2-4 inches in length.
- Step 2: Remove the leaves from the lower part of the stem, leaving just a few leaves at the top.
- Step 3: Allow the cutting to dry out for a day or so before planting to prevent rot.
- Step 4: Stick the cut end of the stem into a small pot filled with fresh potting mix, or place it in a jar of water until roots develop. If rooting in water, change the water every few days to keep it fresh.
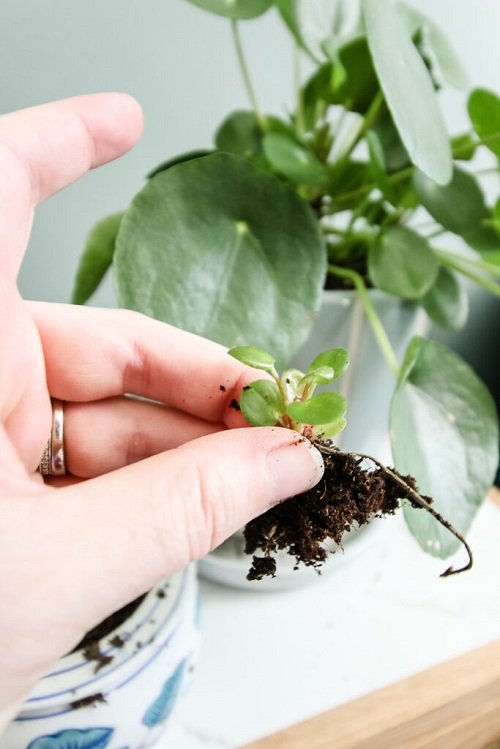
4. Propagation from Pups or Offsets
Many pilea species naturally produce pups, or small baby plants, which grow out from the base of the mother plant.
- Step 1: Once a pup is large enough (has a few leaves of its own), carefully cut it from the mother plant using a sharp, clean knife or scissors. Make sure to include some roots if possible.
- Step 2: Plant the pup in its own pot with fresh potting mix, watering lightly.
- Step 3: Keep the pot in a warm area with bright, indirect light.
For all these methods, it’s important to use a well-draining potting mix and to keep the plants in a warm area with plenty of bright, indirect light. Always keep the soil lightly moist, but avoid overwatering as this can cause the cuttings to rot. The plant will establish roots in a few weeks to a month, and then you can care for them as you would any pilea plant.
Learn all about Silver Tree Pilea Care here
Propagate Pilea Plants – Aftercare
After propagating a Pilea plant, it’s crucial to provide the right aftercare to help the new plants establish and thrive. Here’s a guide to aftercare for your newly propagated Pilea plants:
- Overwatering can lead to root rot and may kill the young plant. A good practice is to water when the top inch of soil feels dry to the touch.
- Place your new Pilea plants in a bright area but out of direct sunlight, which can scorch the leaves. A north or east-facing window usually provides the ideal lighting conditions.
- Pilea plants thrive in warmer temperatures, between 65 and 75 degrees Fahrenheit. They also prefer a humid environment. If your home is dry, you can boost humidity by placing the plant’s pot on a tray filled with pebbles and a bit of water. As the water evaporates, it will increase the humidity around the plant.
Check out our article on growing pilea plant here
- Use a balanced houseplant fertilizer, and dilute it to half the recommended strength. Feed your Pilea plants once a month during the growing season (spring and summer). Avoid fertilizing in the winter when the plant’s growth naturally slows down.
- Prune your Pilea plants regularly to maintain their shape and remove any dead or dying leaves. This helps direct energy toward new growth. Use clean, sharp scissors to make your cuts.
- Keep an eye on your Pilea plants for common houseplant pests such as aphids, spider mites, and mealybugs. If you notice any, treat the plants immediately with insecticidal soap or a solution of water and mild dish soap. Also, check for signs of disease, like discolored leaves or stunted growth.
Check out 16 Pilea Types & Varieties To Grow Indoors here
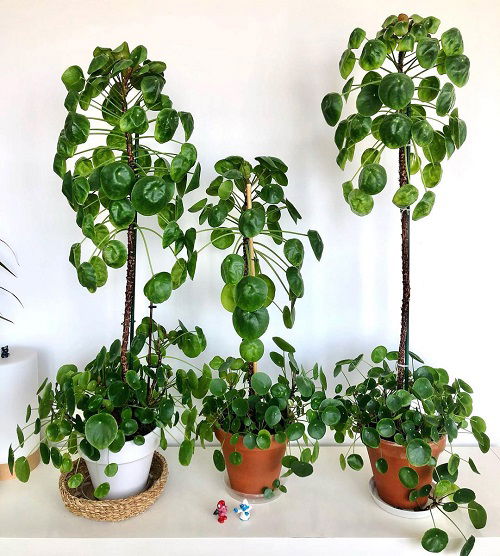
Most Beautiful Pileas to Propagate at Home
The most common variety is Pilea peperomioides, but there are several other stunning Pilea varieties you might consider propagating at home:
- Pilea Peperomioides: The most popular variety, known for its unique round, coin-shaped leaves. They make perfect houseplants due to their ease of care and the aesthetics they add to any interior.
- Pilea Cadierei (Aluminum Plant): This Pilea has striking dark green leaves patterned with silvery white markings, making it a standout among houseplants. The Aluminum Plant is named after the French missionary and botanist, R.P. Cadier.
- Pilea Involucrata (Friendship Plant): This variety is cherished for its textured, deep green leaves with intricate patterns of pink, silver, or cream. Its compact size makes it ideal for terrariums or hanging baskets.
- Pilea Mollis (Moon Valley Pilea): This variety features crinkled, textured leaves with deep valleys and ridges. The foliage is typically green with a touch of red or brown hues.
- Pilea Glauca (Aquamarine): This Pilea variety is a cascading plant that grows fast and features tiny, blue-grey leaves, making it great for hanging baskets.
- Pilea Microphylla (Artillery Plant): Named for its unique method of seed dispersal, when mature, the seeds “explode” from the pods. This variety has small, light green leaves and is often used as ground cover in warm climates or as a trailing plant indoors.
- Pilea Nummulariifolia (Creeping Charlie): This is a perennial evergreen creeper known for its round, green, glossy leaves. Despite its invasive nature in gardens, it’s often used as a decorative plant in indoor settings.