
Check out How to Make Hypertufa Pots Recipe in this article and give a rustic appeal to your garden with these long-lasting weatherproof DIY containers!
The pots made up of hypertufa are lightweight, naturally porous, and offer a controlled micro-environment for plants to thrive. Here’s How to Make Hypertufa Pots.
Check out our list of some exciting spices that you can grow in pots here!
Hypertufa Pots Recipe
Things You’ll Need:
- Peat moss
- Portland cement
- Perlite
- Water
- Vinegar
- Large Plastic Container/Wheelbarrow
- 5-quart bucket (Big mold)
- 2 ½ quart bucket (Small mold)
- Mask & gloves
- Hoe
- Drill tool
- Concrete brush
- Non-stick cooking spray
Note: Remember that the mixture you are going to prepare is an estimation and not need to be done in an exact amount as measurements can vary.
Step 1: Choosing Molds
The mold you choose is going to determine two things–the shape of your hypertufa planter, and the ease of the process. The rectangular and geometrical shapes are trending nowadays! This video shows you how to create one.
Avoid using metal or wooden molds, and if you do, cover them with plastic first, else the cement mix will stick to them, making the removal process a bit difficult. Cardboard and plastic molds work best, and styrofoam is also a good choice. Click here for a styrofoam planter idea.
Step 2: Mix the Dry Ingredients
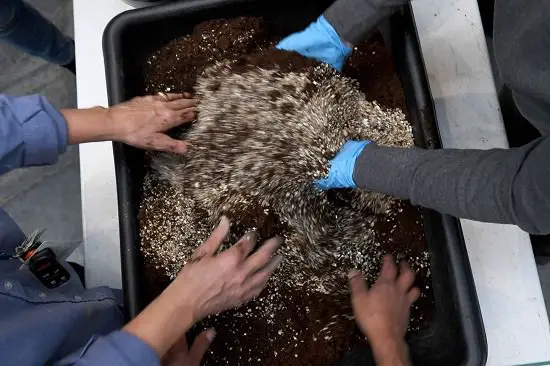
Mix equal amounts of Perlite, Peat moss, and Portland cement in a large container for the right DIY Hypertufa Pots Recipe. Do wear protective gear like gloves and mask while mixing. Break the large clumps to create a smooth, homogenous mixture.
Step 3: Add Water

To create a dense paste, add water slowly, in small quantities, and avoid pouring whole water at once. After kneading for 5 minutes, see if the mixture has the consistency of a crumbly brownie. Take some of it in your hand and squeeze tightly, if it sticks to your fingers and some water oozes out, then you’re good to go. Besides, perform a quick color check as well to see if it’s evenly gray throughout. Allow it to stay in the container for 10 minutes.
Step 4: Cover the Larger Mold
You have two objectives at this stage–to cover the outer side of your smaller mold, and to cover the inner side of the larger mold. Also, this simple strategy will make it easier to take out the tufa from the mold.
Take a bucket and spray the insides with a nonstick, cooking spray. Put some of the mix (one-inch deep) on the bottom part of the pail, gradually working it to cover the sides. To complete the Hypertufa Pots Recipe, add more mixture on the sides to ensure the walls are solid and tight.
Step 5: Cover the Smaller Mold
Once the insides are done, spray the exterior of a smaller bucket with the same nonstick cooking spray.
Step 6: Arrange the Molds
Place the smaller bucket in the center of the bigger one for creating a planter arrangement. While spreading the mix on the exterior, gently tap on the upper end of the container to deviate larger bubbles that might interfere with even spreading. In a Hypertufa Pots Recipe it is essential to smoothen out the lumps you encounter, with your fingers, to achieve the symmetrical shape.
Step 7: Unmold it!
Place the mold inside a plastic bag and seal it well and unmold it after 48 hours, or else it will not harden. Test the tightness of the mixture by pressing with your fingernails, if it leaves a smudge behind, you have to wait for a few more hours. When it feels tight and dry, take it out of the bag and slowly remove the inner bucket. Then turn it upside down and remove the outer one.
That’s it! Your Hypertufa Pots Recipe is Ready!
Remember, hypertufa takes 20-30 days to get ready completely. So it’s best to keep it in the bag and place it in a cool and dry spot. If unmolding seems tough, gently tap the walls of the bucket mold with a hoe or a mallet to easily take out the finished pot.
Give it a Fine Look!
After the pot is completely dry, it will turn to a light shade of gray. Rub sandpaper on the sides for a textured look. It’ll look great that way but you can paint it as well.
Remove the Alkalinity
The Portland cement in hypertufa pots is rich in lime, which eventually leaks out in the potting soil, making it too alkaline for sensitive plants. Therefore, draining off the lime is necessary. If you are planning to use the pot soon, do this immediately after the pot gets dry. You can leave it outside in the rain, and the leaching will occur naturally.
To know more about how to leach it manually. Watch this video!
Prepare for Planting
Once your hypertufa pots are done, they are ready for planting. Fill it with the potting mix and add your plants, but before that–you may also want to take a masonry tool and poke drainage holes at the bottom. Click here for a video tutorial.
Hypertufa Pots Recipe Planter Ideas
- Try different designs of molds and use burlap, bubble wrap, and pebbles as fillers. To create this design, check out this video tutorial.
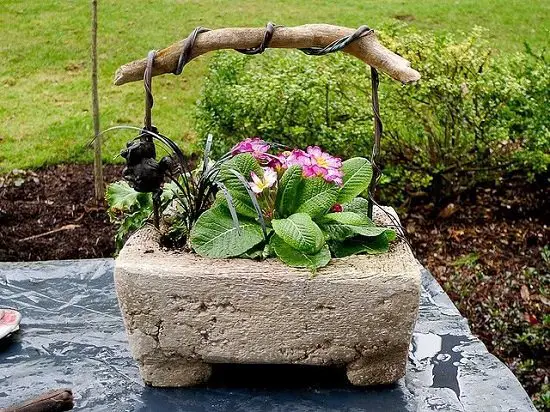
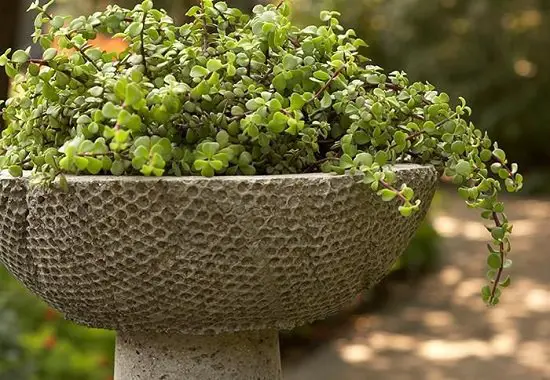
- Plants like moss and succulents go beautifully with the textural finish of these pots.
- You can make a moss and milk mixture and brush it onto the surface of the hypertufa pots. Find the complete guide here.
- Use a concrete brush to remove traces of loose potting soil or dust and clean up freshly potted plants.
- Thanks to its textured rustic appeal, a hypertufa planter creates is ideal for a rock garden. For a more edgy effect, you can also make draped hypertufa pots and spray them with neon shades that reflect light, creating a unique look.
- Hypertufa pots are mainly prized for their natural appearance. Interestingly, colored pots will give a perfect contrast with unpainted containers. You can paint them like this for a different look.
- This guide will assist you in how to make your hypertufa pots plant-ready.
For more such cool planter ideas, click here!