
Looking for the best ways to grow productive vegetables and beautiful flowers organically? These Homemade Fertilizer Recipes will help you!
Chemical fertilizers are available in abundance in the market and have an adverse effect on the environment. So, it is best if you stick to homemade products. Not only are those effective, but they are also eco-friendly. Moreover, homemade fertilizers are also cost-effective.
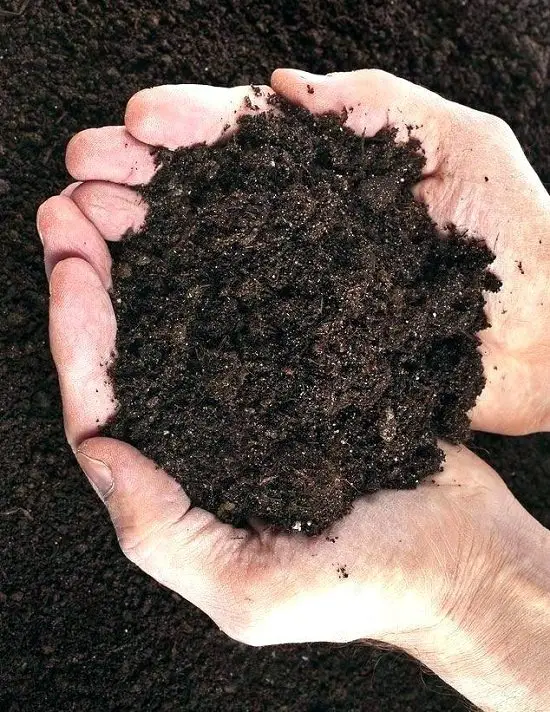
1. Compost Tea
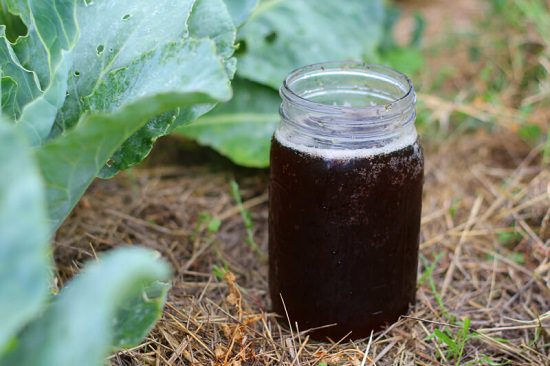
Compost tea is a multipurpose liquid fertilizer and is not only suitable for flowering plants but all plants and vegetables in general. Besides providing nutrients, compost tea has other benefits as well. The study published in NIH proves the positive effects of compost tea on plants.
You’ll Need
- Bucket (5 Gallons Capacity)
- Quality Compost
- Aerator pump
- Filter Cloth
Step 1: Place the aerator pump at the bottom of the bucket. Fill the bucket one third to half with quality compost. Ensure that compost is well-aged and free from any pathogens.
Step 2: Fill the bucket with water but not up to the brim. Leave 3-5 inches of space to provide some stirring room.
Step 3: Add an ounce of molasses to this mix. It will act as food for bacteria, which are beneficial for the soil. Check that molasses should be free from any sulfur content.
Step 4: Mix all the ingredients using a spatula. Continue stirring till you obtain a uniform paste.
Step 5: Switch on the pump as it will aerate the compost tea by providing a continuous flow of oxygen and circulation while the tea brews. Make sure that the pump is powerful enough to move the tea.
Step 6: Let the tea brew for 2-3 days. Stir occasionally around one or two times a day. It is to ensure that no material is left sitting at the bottom during brewing.
Step 7: The Compost tea will be ready within three days. Turn off the pump when tea starts to give a sweet and earthy smell. Strain into another bucket using a filter like a muslin cloth, burlap sack, or cheesecloth.
Step 8: Your compost tea is ready for use. As it starts to lose its potency with time, it is better to use it as soon as possible. It will not be of much use after three days.
You can apply it directly to the soil or use it as a foliar spray. The choice is yours!
Benefits
- It helps in the suppression of foliar diseases when you use it as a foliar spray.
- Plants absorb the nutrients quickly via roots as it is a liquid fertilizer.
- Immunity against diseases is developed because of beneficial microorganisms.
- The productivity of plants increases, i.e., better-tasting vegetables, bigger flowers, and greener leaves.
2. Vegetable Scrap Liquid Fertilizer
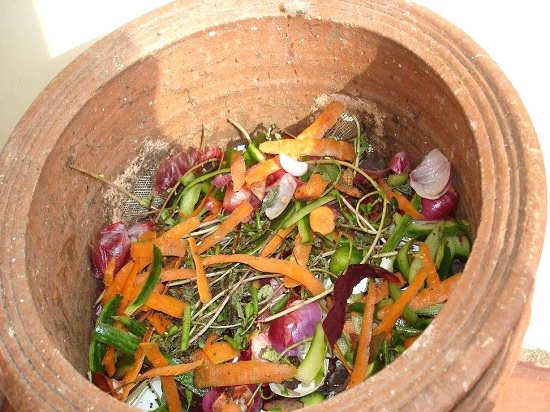
You can make liquid fertilizer from leftover vegetables. This recipe will teach you how to do it. This is perfect for container gardeners and one of the best Recipes for Growing Beautiful Vegetables and Flowers.
You’ll Need
- Vegetable and Fruit scraps
- Blender
- Bucket (5 Gallons Capacity)
- Epsom salt
- Ammonia
- Water
Step 1: Start off by saving vegetable scraps until you have a sufficient amount of scraps, around 2-3 quarts. Both cooked and raw scraps can be used. You can store them in a cool place like a freezer if the process is delayed.
Step 2: Add them to the food blender (buy an inexpensive one for this purpose). Also, pour some amount of water before starting the blender for a smooth paste.
Step 3: Pour the paste into the bucket. Add half tablespoons of Epsom salt and one-fourth tablespoons of Ammonia to every blender full of concoction. Continue to do so till all the scraps are used.
Step 4: Stir the paste concoction in the bucket thoroughly. Cover the bucket and leave it undisturbed for 24 hours.
Step 5: After 24 hours, the paste will be ready for use. To use it, you’ll need to add a quart of paste to one liter of warm water. Once it cools down, your vegetable scrap fertilizer is ready for use.
Apply it directly to the soil nearby the base of the plant.
Benefits
It is an eco-friendly approach to decreasing the production of household garbage while making free of cost organic fertilizer.
3. Weed and Yard Trimmings Fertilizer
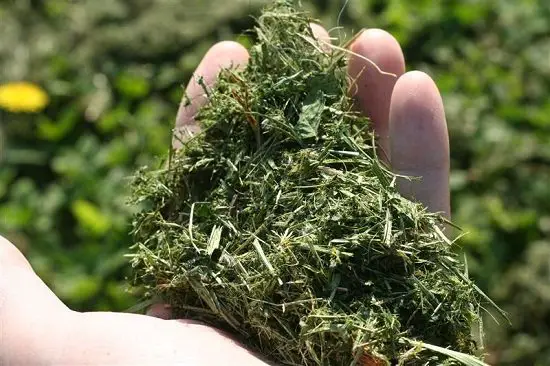
Weeds always pop up in places, and then you have to go through the extra laborious chore of removing them. What else can you do with these weeds? Well, you can make liquid fertilizer using them. Here’s a complete process.
You’ll Need
- Weeds
- Yard trimmings
- Mowed grass
- Large Bucket or Barrel
- Water
Step 1: Take fresh weeds or yard trimmings from the garden and shove them in the bucket up to the top. Remember, do not use weeds treated with herbicides!
Step 2: Pour water into the bucket until only 5 inches is left from the top.
Step 3: Cover the bucket and leave it undisturbed for two to four weeks. It’s that simple!
Step 4: Pour this solution around the base of the plant. This liquid weed fertilizer is amazing and has been applauded by gardeners.
The smell of the solution is somewhat unpleasant, so it is better if you steep it outdoors.
Benefits
- Depending on the type of weed, you’ll get a variety of nutrients to enrich the soil.
- It is found that fresh grass clippings are high in nitrogen and potassium, which are fantastic for supplementing your plants.
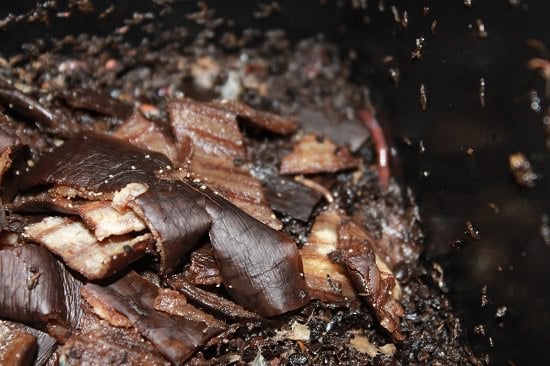
4. Banana Peel Fertilizer

We all know that bananas are packed with nutrients, but what about banana peels? We generally throw them away. But what if you could enrich the soil using banana peels? Wouldn’t that be fantastic? They are rich in potassium and can be used in many different ways.
-
Banana Peels Compost
It’s a straightforward process. All you need to do is add slicked banana peels to the compost pile. It will accelerate the overall process of composting and will increase the retaining water capacity of compost and, when added to the soil, it makes it lighter.
-
Dry Banana Peels Mulch
As it might already be clear from the name of this process, use dry banana peels for mulching. Just layer the top surface of the soil with dried banana peels. If you live in warm climatic conditions, it’ll help the soil to retain moisture, and you won’t have to water that frequently. Not only that, but banana peels will also enrich the soil as it starts to break down and decompose in some time.
-
Banana Peel Spray
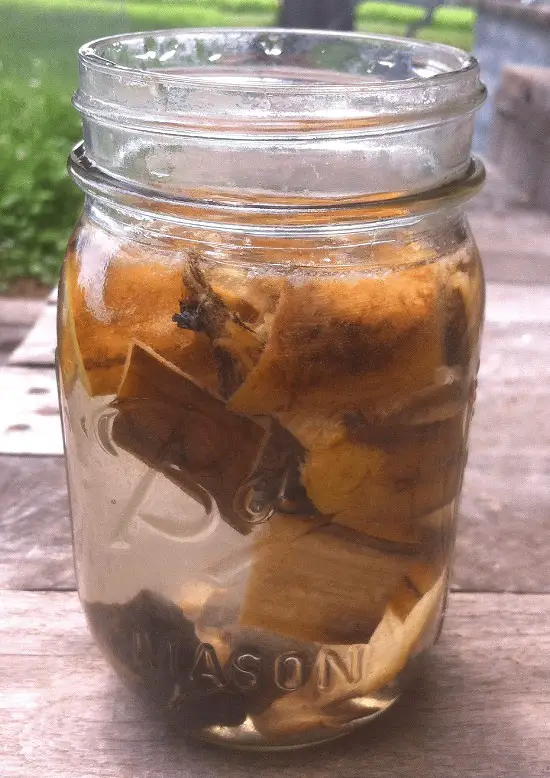
Put some banana peels in the bottle and fill it with warm water. Leave the bottle undisturbed for two weeks. Banana peels will undergo fermentation at this time. After that, you can treat the soil with this solution or directly spray it on the leaves. If you have always wanted the best Recipes for Growing Beautiful Vegetables and Flowers, this is it!
-
Eggshell Banana Peel Fertilizer
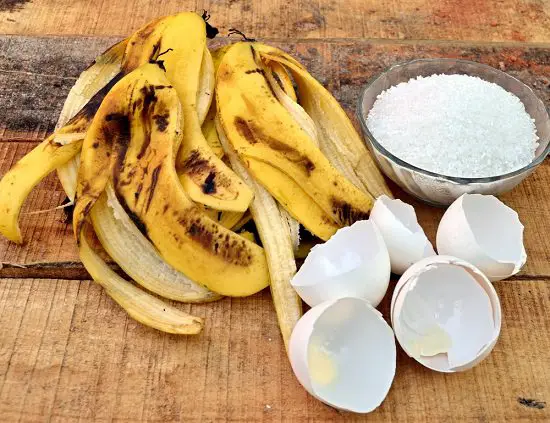
You will require 3-4 dried banana peels, 3-4 eggshells, and Epsom salts. What you need to do is put all the ingredients together into a blender and run it. The mixture then obtained should be transferred to a spray bottle. Add water in equal quantity to that of the powdered mix and shake well. You can use it as a foliar spray or apply it to the soil.
-
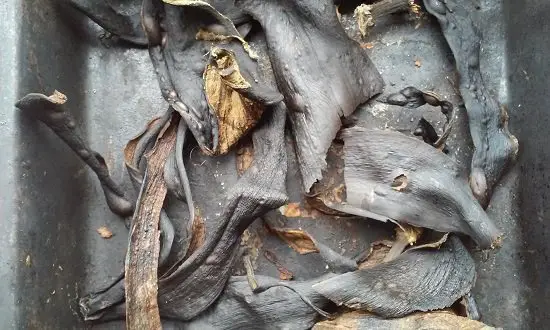
Dehydrated Banana Peels Fertilizer

This recipe for making banana peel fertilizer is especially useful for flowering plants. Dry the peels in full sun. Alternatively, you can also place banana peels in the oven. For this, set them on the tray with the inner surface facing up so it does not stick to the tray. Now put this tray in the oven while cooking something else owing to the fact that it will save electricity.
Let the leaves cool off and crush them manually, or you can obtain a powdered form by using a blender. Sprinkle the dehydrated banana peels around the houseplants or use it for side dressing your plants.
Add one tablespoon of powdered banana peel to the planting hole. Make sure to add a layer of soil over it before planting.
Benefits
- Banana peels are about 42% potassium. The movement of nutrients and water between plant cells is enhanced because of the high potassium content.
- It also discourages floppy growth in plants by strengthening the stems.
- Micronutrients such as calcium, magnesium, and sodium are also at high levels in banana peels. These are essential for healthy plant growth.
5. Fish Emulsion
Treating garden soil with fish emulsion might feel like a bizarre way to boost blooms, but it is not! It has been around for a while and is a great alternative to harmful chemical fertilizers. Moreover, the NPK ratio of fish emulsion is 4:1:1, which makes it great for plants with a nitrogen deficiency. It is one of the best Recipes for Growing Beautiful Vegetables and Flowers.
You’ll Need
- Fish Scraps or Whole Fish
- Container
- Molasses
- Organic Matter
- Water
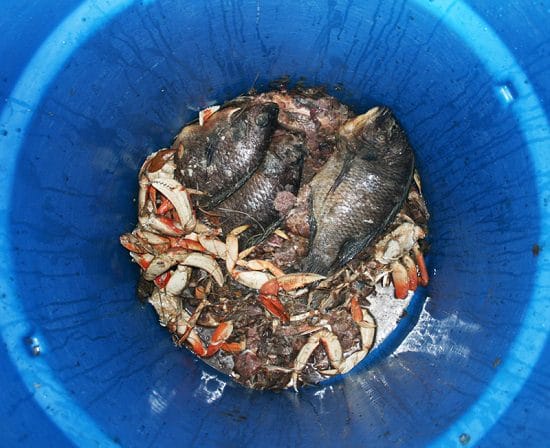
Step 1: Collect fish scraps and put them in a bucket up to one-third of its height. You can also use a whole tilapia fish.
Step 2: Add organic matter like sawdust or leaf litter to the bucket in equal parts to that of fish scraps.
Step 3: Add molasses to this mix, as it provides a food source to the helpful bacteria, which are beneficial for the soil. Use unsulfured molasses for this.
Step 4: Fill the remaining space available in the bucket with water. Cover the bucket and keep it in a shady spot.
Step 5: Stir the contents of the bucket 2-3 times a week. Strain the contents into another container after a week. The solution obtained is called the fish emulsion.
Step 6: Before using the fish emulsion, dilute it by adding a gallon of water to one cup of fish emulsion. Apply this directly to the soil or on the foliage of plants.
For a more nutrient-rich solution, you can also add seaweed with organic matter.
Benefits
- The NPK ratio of fish emulsion ranges from 5:2:2 to 5:1:1, which is pretty high considering it’s homemade.
- It uses parts of the fish, which you would have dumped in the trash otherwise.
- It is an all-purpose fertilizer and can be used for fruiting, flowering, or showy plants.
6. Seaweed Fertilizer
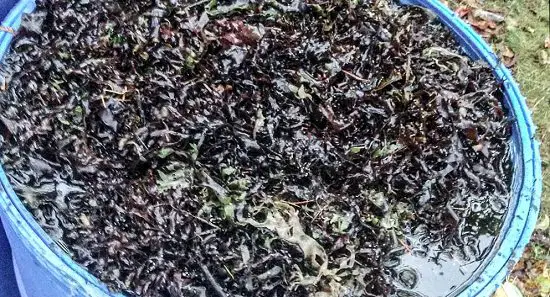
Seaweed is used to prepare a liquid fertilizer rich in trace elements that are absent from most fertilizers. Kelp is the most commonly used seaweed, although other seaweeds can also be used. If you live nearby to the seashore, this weed will be available in abundance as it grows near water bodies. Don’t despair if you are not able to lay hands on seaweed. You can easily buy seaweed fertilizer from the local garden center online.
You’ll Need
- Seaweed
- Bucket
- Water
Step 1: Fill the bucket one-third with water. Just remember, chlorinated water is not suitable for this.
Step 2: Add seaweed to this bucket with as much quantity as it can contain with ease.
Step 3: Cover the bucket and stir it occasionally every 2-4 days. The potency of fertilizer will increase over time.
Step 4: It will be ready for use from a few weeks to a few months. When the solution is free from the smell of ammonium, you can use it.
Step 5: Dilute one part of liquid seaweed with three parts of water before applying to the soil or garden bed.
Benefits
- Although it is not rich in NPK, it does contain trace minerals, vitamins, and enzymes that are not found in other fertilizers.
- The nutrients boost cell growth in plants, which results in healthy, active, and disease-resistant plants.
- Direct application on foliage results in much quicker absorption of nutrients as it can be used as the foliar spray.
7. Homemade Miracle Grow
Miracle-Gro is a commercially available fertilizer. You can also prepare a recipe similar to it for your garden without much difficulty using the ingredients commonly available at your home. As it is water-soluble, the soil soaks up the fertilizer readily. Thus, providing nutrients to the roots quickly.
You’ll Need
- Epsom salt
- Baking soda
- Household Ammonia
- Container
- Water
Step 1: Pour one-gallon water into the container.
Step 2: Add one tablespoon of Epsom salt, one tablespoon of baking soda and half a tablespoon of ammonia to the bucket.
Step 3: Mix all the ingredients using a spatula. Continue stirring until all the constituent ingredients get dissolved completely.
Step 4: Your miracle-gro is ready for use. Pour it into any watering can and use it once a month on plants.
Do not overuse this solution. It may cause damage to leaves and roots if applied frequently.
Benefits
- It contains the big three – Nitrogen, phosphorous, and potassium in an ample amount.
- The deeper the root system goes, the more difficult it becomes for fertilizer to reach it. Miracle-gro will be able to reach great depths.
- The ingredients used are cost-effective.
8. Fish Aquarium Water

Generally, we drain the old water present in the aquarium and replace it with fresh water. You would be surprised to know that aquarium water is rich in many nutrients and very beneficial for plants. Just pour the water present in the fish tank into the watering can and water your plants with it, or dunk the air plant in it.
Benefits
- The nutrients are somewhat the same as fish emulsion, minus the labor.
- Other ingredients such as eggshells and banana peels will decompose quickly when added to this water, thereby increasing the nutritional value.
9. Epsom Salt Solution
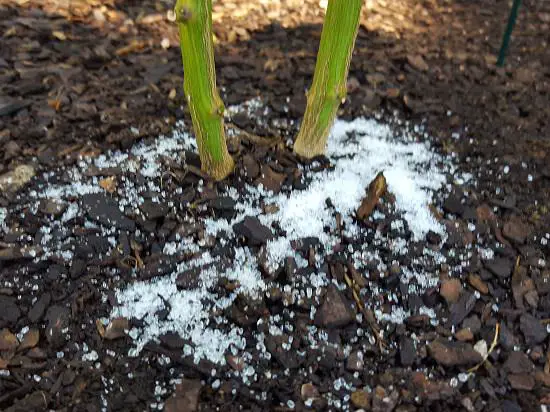
You might have observed that Epsom salt is used as an ingredient in some of the homemade recipes listed above. Well, it is because the Epsom salt is made up of minerals such as magnesium and sulfate. These minerals, when supplied to the soil, promote healthy growth and colorful blooms in plants.
To make fertilizer using Epsom salt add two tablespoons of Epsom salt to one gallon of water. Simple as that! Stir the solution till no residue remains. Feed your plants with this solution once a month.
Benefits
- Epsom is an effective remedy against aphids and other such bugs.
- Foliage infected from diseases and blemishes can be treated with Epsom salt solution.
- It boosts the production of chlorophyll in plants. Thus plants produce greener and lush leaves.
- Particularly effective for peppers, tomatoes, and roses.
10. Pomegranate Peel as Fertilizer
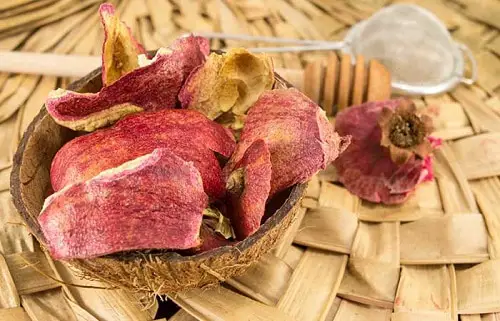
Being a rich source of iron and other essential minerals, pomegranate peels can be a great organic fertilizer for your plants. The peels have Phosphorus, Potassium, Calcium, Magnesium, Boron, Iron, Copper, and Zinc that’ll offer vital nutrients to the plants, making it one of the best Recipes for Growing Vegetables and Flowers.
You’ll Need
- Pomegranate peels
- Grinder
- Water
Chop the peels finely so that they’ll grind easily. Now, put them into the grinder and add little water to make a slurry like paste. Dilute this paste with water in 1:4 parts and water your plants with this blend.
Benefits
- The paste will promote the soil microbiology and soil organisms that will eventually aid in the plant’s health.
- It promotes earthworms and millipedes.
Very Useful Content .Please let me know when NPK if used directly ,by mistake ,what got to be done afterwards .Regards
Very nice,easy and cheap
Great information. I’ve been doing this (thanks to my Granny) for years, but never knew why!
Very informative. Will help me a lot buying fertilizers when I can make it myself. Thank you so much. 🙏