
Do you know that you can save a dying orchid and almost recover it? You’ll Never Throw Away Dead Orchids After Reading this Post.
The next time you witness an orchid in dead bits, don’t presume it dead. You can bring it back to life by following the simple trick shared below.
Follow the tips and save yellow orchid leaves here
Resurrecting Orchids
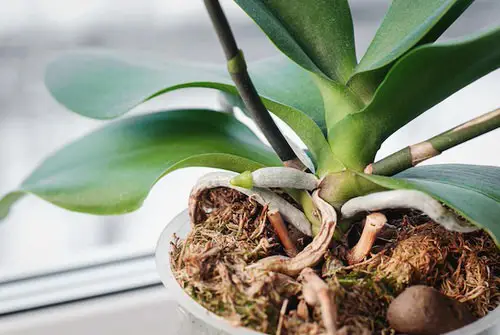
If you see a dying orchid somewhere (garden center, friend’s home, your place), which could be due to any of these reasons: overwatering, underwatering, wrong growing medium, pests problems, or exposure to a very low temperature below 50 F (10 C), then don’t throw it away thinking that it cannot be saved.
Bring it Back to Life
If you see orchids in bad shape, where they look droopy, wilted, or have yellow foliage, then here’s what you can do:
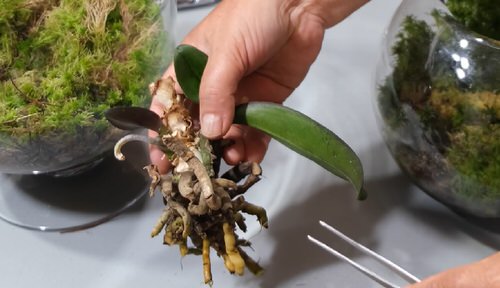
1. Inspect the Roots
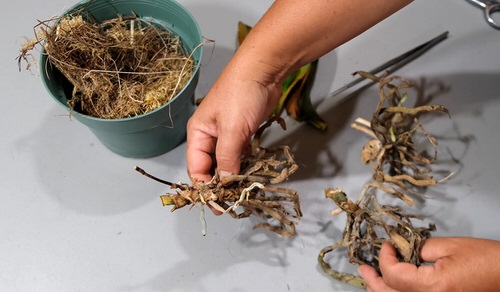
Before you decide to throw away the plant, it would be a good idea to take it out from the pot and inspect and identify for the signs of even a wee bit of healthy roots.
If you notice any–snip away the dead and damaged roots carefully, making sure you keep the green and healthy ones intact.
Here are the best orchid flowering secrets
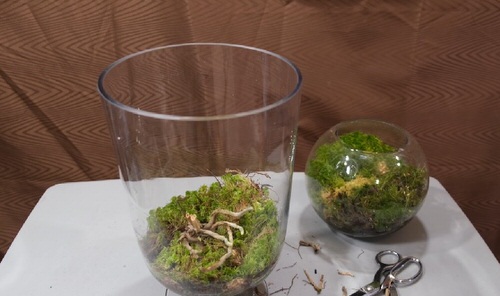
2. Not, Get a Vase or Clear Jar
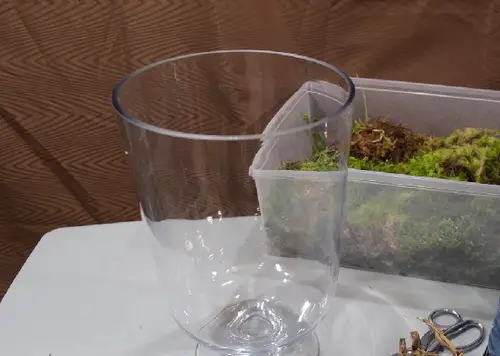
Take a vase that’s around 14-20 inches deep and about 8-10 inches wide.
3. Fill the Vase with Water and Sphagnum Moss
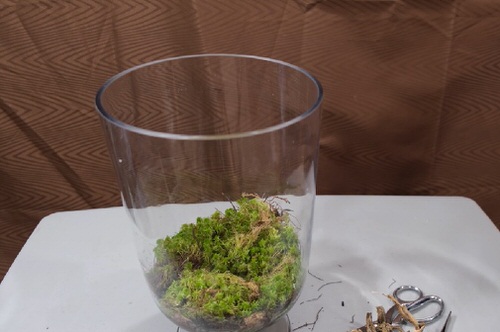
Now, fill the vase with rain or RO water for about an inch or two. Then, fill 1/4 of the vase with fresh and live sphagnum moss, as shown in the picture. This will provide all the humidity and nutrients an orchid needs.
Check out the best orchid planter ideas here
4. Place Saved Roots in the Vase
Now, place the saved roots of the orchid inside the vase on top of the sphagnum moss. Do not put the roots into the moss and ensure not to bury them inside the moss–just place them on top.
Note: As the aerial roots of the orchid absorb moisture and nutrients from the air. For this, they don’t need to grow in regular soil.
Here are the most common orchid growing mistakes you need to avoid
5. Keep the Vase Where it Gets Plenty of Bright and Indirect Light
Add a bit more water, making sure it moistens the sphagnum moss evenly, but also care not to submerge the roots in water.
Place the vase in a location where it gets ample indirect and bright light. Do not cover the vase with anything as it will result in rotting.
After a few weeks, you will see new growth shoot up from the roots from which new orchids will grow.