
Curly Spider Plant Care is easy as long as you know how to do the right care of it. Read ahead to learn more about this beautiful spider plant variety!

If you want a spider plant with curled-up foliage, then this is it. The plant looks great in hanging baskets and tabletops and makes quite an impressive impression with its leaves. Let’s have a look at Curly Spider Plant Care.
Botanical Name: Chlorophytum comosum ‘Bonnie’
Types of Spider Plants
Primarily, there are three types of spider plant varieties –- Variegated, Green, and Curly!
- The most common type of Spider plant is the variegated one. With its contrasting colors, it makes for a great indoor plant.
- The green variety is scarce. Not many plant nurseries sell this one.
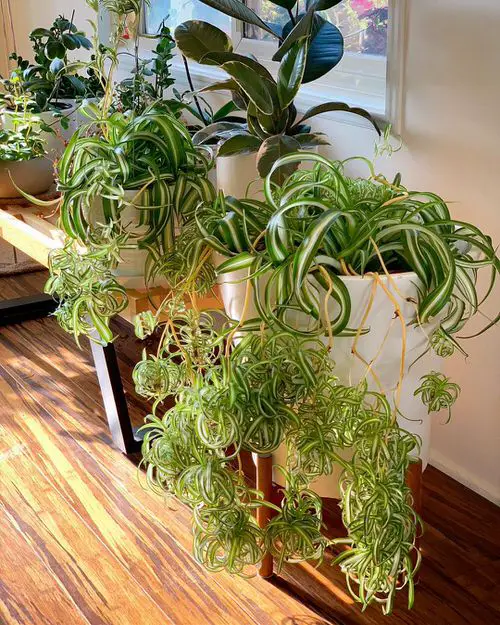
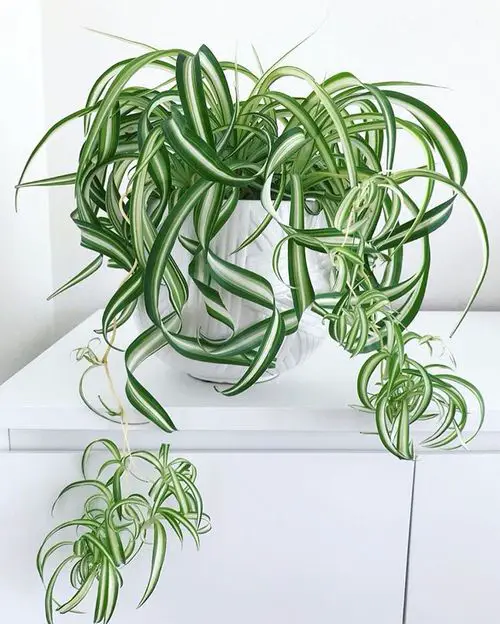
- The Curly variety is a sight to see! With variegated leaves, this type flows into little curls at the end. This, again, is not easy to find, but it is just an internet search away!
Curly Spider Plant Appearance
Propagating Curly Spider Plant
Ways to Propagate Curly Spider Plant
- Offset Division
- Stem Cuttings
- Plantlets
The Most Popular and Reliable Method: Offset Division
Offset division is often considered the most reliable method for propagating Curly spider plants. This is because it mimics the plant’s natural way of reproducing, and it is relatively straightforward.
Steps to Grow Curly Spider Plant by Offset Division
You can easily propagate the Curly Spider plant by following these steps.
- Identify Mature Offsets: Look for well-developed offsets (baby spider plants) that have a few leaves and a small root system.
- Prepare a New Container: Choose a pot or container with well-draining potting mix and drainage holes. Ensure it’s an appropriate size to accommodate the offset comfortably.
- Remove the Offset: Gently and carefully detach the offset from the parent plant. You can do this by using clean scissors or pruning shears to cut the offset away from the stem, or you can twist and pull it if it comes away easily.
- Plant the Offset: Place the offset in the new indoor container, positioning the roots in the potting mix and ensuring the leaves are above the surface. Gently pat down the soil around the base of the offset to secure it.
- Water the New Plant: Give the newly potted offset a thorough watering with room-temperature water to settle the potting mix and provide moisture to the roots. Ensure the potting mix remains evenly moist but not waterlogged.
- Provide Adequate Indoor Light: Place the new plant in a location with bright, indirect indoor light. This can be near an east or west-facing window with filtered sunlight, or you can use artificial grow lights to supplement light as needed.
- Monitor and Maintain: Keep a close watch on the new plant’s growth and adjust its care routine as necessary. Continue to water as needed to maintain appropriate moisture levels in the indoor container.
How to Make a Spider Plant Bushier & Lush: 8 Tricks
Advantages of Offset Division
- Genetic Purity: Offsets are genetically identical to the parent plant, ensuring that the new plants will exhibit the same desirable traits and characteristics.
- Established Roots: Offsets typically have a small but developed root system, which increases their chances of successful transplantation and reduces the risk of transplant shock.
- Quick Growth: Because they are already partially developed, offsets tend to grow more quickly than plants propagated from seeds or stem cuttings.
Choosing a Container for Curly Spider Plant
Opt for a pot that provides ample space for the plant’s root system to expand but isn’t excessively large, as spider plants prefer to be slightly root-bound. A container with a diameter of about 1 to 2 inches (2.5 to 5 cm) larger than the plant’s current size is generally suitable.
Ensure the pot has drainage holes to prevent waterlogging, which can lead to root rot.
Requirements for Growing Curly Spider Plants Indoors
Location
Curly spider house plant thrives in bright, indirect light. It can tolerate some direct morning sunlight but avoid harsh afternoon sun, as it can scorch the leaves.
They are versatile and can adapt to various light conditions, making them suitable for different locations in your home. So, Where to put the curly spider plant? Placing it near a bright window is usually ideal.
Note: If you place them in lower light conditions, they may grow more slowly and produce fewer offsets but should still remain healthy.
Soil
Well-draining potting mix is crucial for Curly spider plant indoors. A mix formulated for houseplants or a combination of potting soil and perlite or vermiculite works well.
Make sure the pot has drainage holes to prevent waterlogged soil, as spider plants are sensitive to overwatering.
Spider Plant Benefits (Scientifically Proven)
Watering
Keep the plant slightly on the moist side, never allowing the soil to go completely dry, especially if it’s growing in a hanging basket at a windy spot.
During the growing season (spring and summer), you may need to water approximately every 1-2 weeks for proper Curly spider plant needs. In the dormant season (fall and winter), reduce the frequency of watering, allowing the soil to dry out slightly between waterings.
Temperature
Maintain temperatures between 65°F to 75°F (18°C to 24°C) for your Curly spider plant. Avoid exposing it to drafts or extreme temperature fluctuations.
If you have particularly dry indoor air, consider occasional misting around the plant or using a humidity tray to increase moisture in the immediate vicinity. Maintaining average humidity is sufficient for their well-being.
Curly Spider Plant Care
Fertilizer
Use a balanced, water-soluble houseplant fertilizer with an N-P-K ratio of approximately 10-10-10 or 20-20-20. During the active growing season, which typically spans from spring to early fall, you should fertilize your Curly spider plant approximately every 2-4 weeks but in 1/2 of the recommended dose prescribed the manufacturer. This provides the plant with the nutrients it needs to thrive.
During the dormant season (fall and winter), reduce or suspend fertilization. Spider plants tend to grow more slowly during this time, and they don’t require as many nutrients.
Pruning
Pruning your Curly spider plant is a straightforward task that can help maintain its attractive appearance. To trim your plant, simply use clean, sharp scissors or pruning shears to snip off any brown or yellowing leaves, as well as any long, leggy stems.
Trimming away these dead or unsightly parts not only improves the plant’s aesthetics but also encourages new growth. Additionally, you can remove any offsets (baby spider plants) that appear on long stems for Curly spider plant maintenance.
Pests
- Spider Mites: These tiny arachnids can create fine webbing on the plant and cause stippling or yellowing of leaves.
- Mealybugs: Small, white, cottony insects that often congregate in leaf axils and can weaken the plant.
- Aphids: Small, soft-bodied insects that cluster on the undersides of leaves and can distort growth.
- Scale Insects: Hard, shell-like pests that attach themselves to stems and leaves, sucking plant sap.
- Fungus Gnats: Small, flying insects that lay eggs in the soil, and their larvae can damage plant roots.
Diseases
- Root Rot: A fungal disease caused by overwatering or poor soil drainage, leading to root decay and plant decline.
- Leaf Spot: Fungal or bacterial infections that manifest as brown or black spots on the plant’s leaves.
- Powdery Mildew: A white, powdery fungal growth that can cover leaves and affect plant health.
- Fusarium Wilt: A soil-borne fungal disease that can cause wilting, yellowing, and stunted growth in the plant.
- Botrytis Blight: A fungal disease that produces grayish-brown fuzzy growth and affects flowers and foliage.
- Rust: Another fungal disease characterized by orange or reddish-brown pustules on leaves.
I like