
Discover 5 Great Ways to Propagate a Christmas Cactus easily and have many of these flowering houseplants in your home.
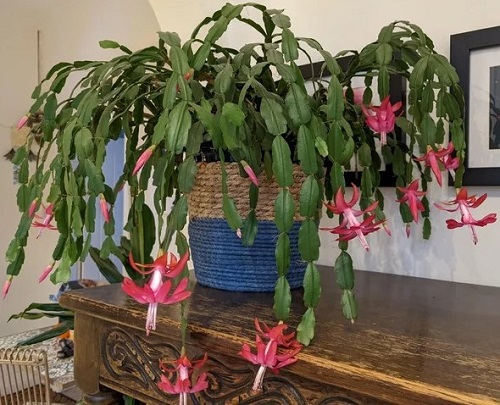
Christmas cactus is easy to grow, but what is even easier is its propagation. There are more than five ways to do that, and all of them are listed below.
Ideal Time for Propagating a Christmas Cactus
Propagating a Christmas cactus is best during late spring and summer. This period aligns with the plant’s natural growth cycle, making it the optimal time for rooting and growth.
The warmer temperatures and increased daylight during this season encourage faster root development and healthier growth.
You can also do it in early fall and even try it in odd times like winter if you propagate it in a controlled indoor environment.
Note: You can multiply this flowering succulent at any time of the year 😃 if you live in a warm, frost-free climate, except for the peak summer.
#1. From Cuttings
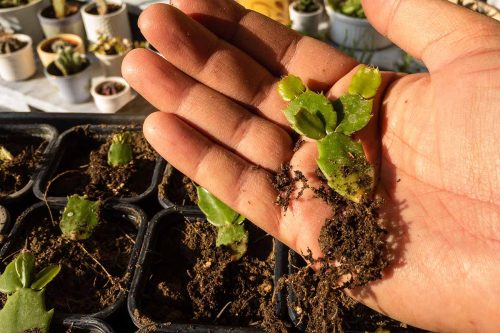
Before you start your propagation process, carefully inspect your Christmas cactus and look for segments free from signs of disease or damage. They should be healthy, plump, with vibrant color, and free from any blemishes or wilting. Also, you can water the cactus thoroughly a couple of days prior to taking the cutting.
1. Taking a Cutting
Cut a section with at least 3-4 segments using clean and sharp scissors or a knife, or use your fingers to twist it, but make sure it is removed cleanly because each joint represents a segment where roots can potentially grow.
2. Let it Form a Callus (Most Important!)
After cutting the segment, allowing it to air dry to form a callus is crucial. This can be done by placing the cut end overnight in a dry area. You can also keep it for 2 days if the weather is moist or humid.
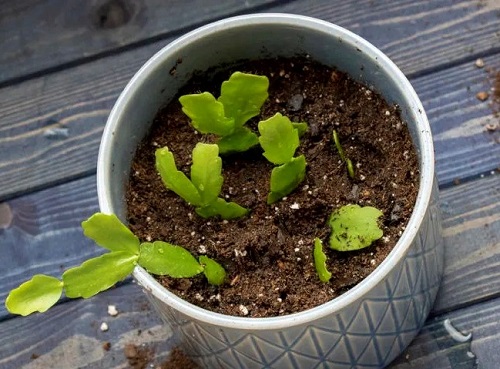
3. Planting
Choose a well-draining soil mix for this, or use just 100% coarse sand, perlite, peat moss, or coco peat.
Plant the cutting, burying one joint in the substrate. This joint will serve as the anchor point from which roots will emerge. Ensure that the rest of the segment is above the soil surface.
4. Watering and Taking Care
Water the planted segment sparingly – use a mister bottle and keep the growing medium moist in a way that a few specks of dirt stick to your finger when you touch it.
Overwatering can lead to root rot, so it’s essential to keep the soil slightly moist but not soggy. Gradually increase watering as roots develop!
Place the newly planted segment in a location with bright, indirect light. Avoid exposing it to harsh sunlight initially, as the plant is still establishing roots.
#2. From Division

1. Separating the Plant
Before doing this, make sure your Christmas cactus is watered thoroughly. Then, carefully remove the Christmas Cactus from its pot. Gently brush away the soil to expose the root system. Look for natural divisions in the plant where it can be easily separated into two or more sections.
2. Make the Cut
Using your sterilized tool, cut through the roots to divide the plant cleanly. Ensure each section has a good amount of roots attached. It’s like giving each new plant its own little starter kit to grow and thrive.
How to Grow White Christmas Cactus
3. Potting New Sections
Place each division in its own pot filled with a quality succulent soil mix. Plant them at the same depth they were growing before. This familiarity helps them adjust more easily to their new environment.
4. Water Wisely
After potting, don’t irrigate for some days; wait for the substrate to dry out; once it is dry, water thoroughly. Christmas Cacti prefer a “less is more” approach to watering. Let the soil dry out a bit between waterings afterward in the future.
5. Find the Perfect Spot
Place your new Christmas Cacti in a location with bright, indirect light. Avoid full-day direct sunlight, which can be too harsh for these rainforest succulents.
#3. From Layering
Layering is another effective method, especially if you want to propagate without actually cutting the plant.
1. Choose a Healthy Parent Plant
Pick a healthy Christmas cactus with vibrant leaves. This will be your “parent” plant. Ensure it’s disease-free and thriving!
2. Select the Right Segment
Look for a mature segment that’s firm yet flexible. This is key for successful layering!
3. Prepare a Growing Medium
Christmas cacti love soil that mimics their natural habitat – a mix of potting soil, sand, and perlite works wonders.
4. Bend and Tuck
Gently bend the chosen segment downwards towards the soil in your pot. The goal is to make it touch the soil while still attached to the parent plant.
5. Secure the Segment
Use a hairpin (in a way that doesn’t pierce to damage the leaf) or a small stone to secure the segment in place. Make sure it’s snug and has good soil contact.
6. Wait and Watch!
Keep the soil neither too moist nor too dry, and place the pot in a bright, indirect light spot. The roots will develop from the segment in a few weeks. Once you see the new growth emerge, carefully sever the new plant from the parent.
Congratulations! You’ve successfully propagated a Christmas cactus!
#4. From Seeds
The best time to propagate it from seeds is in warm weather. It can take 2 years for a Christmas Cactus to grow from seed to reach maturity and bloom, and it is rather a slow process compared to the above three. Here’s a nice video to watch to understand about seed propagation.
1. Getting Seeds
Begin by identifying mature Christmas cactus fruits that usually appear after the plant has bloomed. Gently crush the fruits or use a small tool to release the tiny seeds. Collect the seeds in a container, ensuring they are free from pulp.
You can also get the seeds online or from a garden center. Remember, fresh seeds are the most viable!
2. Sowing
Fill your container with the seed starting mix and moisten it slightly. Sprinkle the seeds on the soil surface and water them lightly – the weight of the water will bury them just right in the growing medium.
Follow Tricks to Grow a Big, Bold, and Blooming Christmas Cactus
3. Taking Care
Place the container in a warm, bright spot without direct sunlight and cover it with a plastic bag. Keep the soil consistently moist, not soggy. Use a spray bottle to water the growing medium when the top layer feels a little dry to the touch.
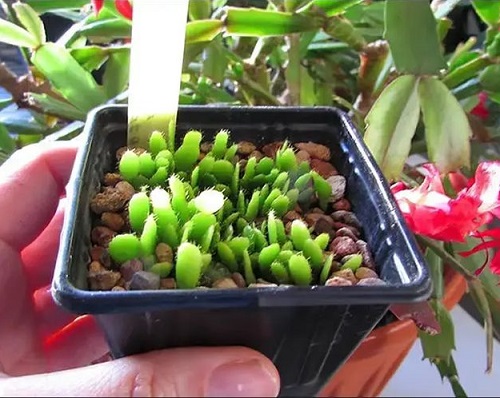
4. Germination
In 2-6 weeks, tiny seedlings will emerge. At this point, open or remove the plastic cover to introduce air circulation.
5. Transplanting
When seedlings are about a few inches tall, you can transplant them into the pot of your choice.
#5. Propagating Christmas Cactus in Water
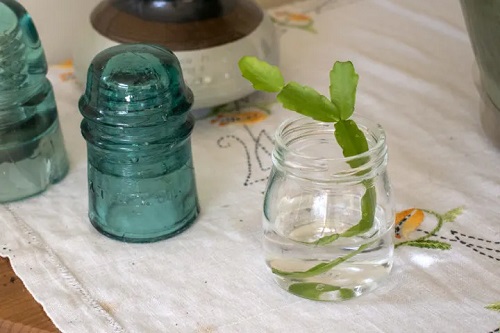
#Taking the segment for this is also the same as discussed in part one of the cutting section.
1. Planting Cuttings in Water
Fill a vase or glass with nonchlorinated or RO water, and submerge the cuttings’ lower portion (bottom tip).
2. Place in Indirect Light
Put it in a location where the cutting can get indirect sun all day long. Direct light can cause stress to the cuttings.
3. Change Water Regularly
Change the water every few days to keep it clean and prevent the growth of algae or bacteria. This helps maintain a healthy environment for the developing roots.
4. Wait for Root Development
Over the next few weeks, the cuttings will start developing roots.
5. Transplant into Soil
The cuttings can be transplanted into the soil once the roots are 1-2 inches long. Use a well-draining potting mix suitable for cacti.