
Want to know How To Make Bone Meal Fertilizer At Home? Here are the best ways you can do it! Read on!

Bone meal is a nutrient-rich formulation that is typically made by steaming and grinding animal bones. It can fortify the soil with high levels of phosphorus, potassium, nitrogen, and calcium. If you want to know How To Make Bone Meal Fertilizer At Home, then keep on reading!
What is Bone Meal?

If you see yourself asking this question – What is Bone Meal, it is produced by fat-free, dried animal bones that are grounded to make a fine powder. This supplement is rich in phosphorus and calcium. According to research, it contains about 8% N, 5% P, 1% K, and 10% Ca.
How is Bone Meal Made?
If you want to know How is Bone Meal Made, then the answer to that question is from steamed animal bones, which are grounded into fine powder or granules. Then, it is mixed with the growing medium and applied in selected quantities to the plant to boost its growth.
What is Bone Meal Good For?
Want to know What is Bone Meal Good For? Keep on reading!
- It increases phosphorus in the soil, which plays a big role in photosynthesis, and flower, root, and seed production. ‘P’ in the NPK is phosphorus; it helps increase fruiting, improves flowering, and encourages seed yield.
- Bone meal breaks down slowly, making it ideal for long-term fertilizers that must be applied once per year.
- If you are looking for organic gardening methods, then it is a perfect option for you. Bone meal fertilizer is entirely chemical-free.
- Bone meal is rich in micronutrients such as; zinc, magnesium, and iron that promote plant health.
- If you apply too much by mistake, it won’t burn the plant.
Bone Meal as a Fertilizer
If you want to know whether you can use Bone Meal as a Fertilizer, then the answer to that question is yes, you can.
It acts as a slow fertilizer that releases over a period of several months by increasing soil microbes across the growing season and amplifies its structure for the root system of plants. All these aid in better growth, flower and fruit production.
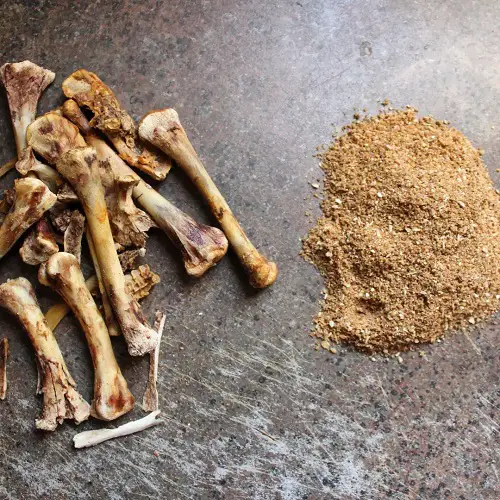
How to Make Dry Bone Meal Fertilizer?
Keep on reading to learn How to Make Dry Bone Meal Fertilizer.
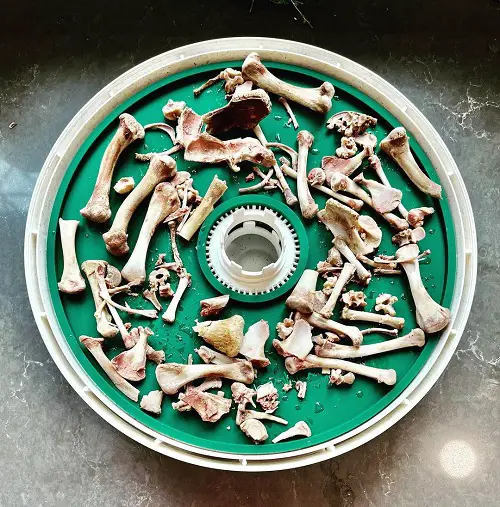
Step 1. Clean the Bones
The first step is to remove any remnants of fat and meat from the bones. Consider scraping the surface thoroughly till they are spanking clean; if that isn’t effective, pressure cook the bones for 5 minutes.
Step 2. Bake
After cleaning the bones, bake them at 400-450°F or until they get all dry and fragile. Ideally, small and medium bones will take an hour to reach that stage. Keep them aside and let them cool down.
Step 3. Fragment
Transfer the bones to a tough bag or sack and use a bat or a rolling pin to smash them into tiny fragments about an inch long.
Step 4. Grind
Toss the bone pieces in a blender and grind them thoroughly till they form a fine mixture. Mix the bone dust with wood ash or sprinkle it directly on your garden bed.
Still confused? Learn how to make a dry bone meal in a video here
Preparing Liquid Bone Meal Fertilizer
1. Choose the Right Bone Type
The type of bone you choose will determine how nutritious the solution is. You can choose turkey bones, beef bones, chicken bones, and pork bones.
Beef and turkey bones are very effective. Chicken bones are easier to handle. All other bones like pork and lamb can be used too.
2. Clean Up
Use a knife or scraper to eliminate traces of meat, grime, and other residues from the surface of bones. This is important because the fatty deposition can retard the decay of the bones when they turn into dust later.
Consequently, your plants won’t be able to acquire the full components of nutrients they could. For a more thorough clean-up, boil the bones for an hour. This will remove fat and dismantle the bone marrow for the effective release of nutrients.
3. Bake
Keep the bones in an oven preheated to a temperature of 284 degrees or higher. This will dry them out completely to make the grinding process easier and also ensure that any pathogens are effectively killed.
If you don’t have an oven, consider steaming the bones in a pressure cooker for 30 minutes instead. Allow them to dry out before proceeding further.
4. Pound
Bones are among the toughest things in the world. That is why you have to smash them with a mallet to fragment them into pieces before the actual grinding process. Fragmentation will simplify and shorten the grinding process.
5. Grind
Toss the bone pieces into a grinder or grind them using a mortar and pestle until they’re not transformed into fine bone dust.
6. Test Your Soil
Make sure you know the nutrient composition of your soil. That way, you’ll understand how much water and bone meal to mix to prepare the liquid bone meal fertilizer.
If the calcium and phosphorus levels are high in your soil, add just a teaspoon or two of bone meal to regular fertilizer. Otherwise, increase the quantity if the soil is deficient in these minerals.
7. Mix ‘n’ Match
Mix the bone meal into the water in a pot over medium heat. The heat allows the water to absorb more bone meal than it would otherwise.
Continue mixing until no bone meal settles as sediment, then set the pot aside so your liquid bone meal fertilizer can cool down.
8. Follow-Up
Monitor the soil after every application to track changes over time. Determine the calcium and phosphorus levels in your soil to understand and adjust the quantity of bone meal in every fertilizer dose accordingly.
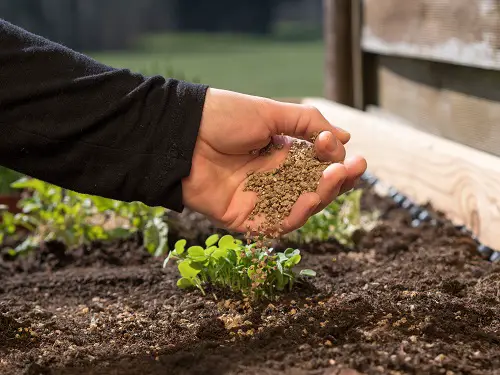
Preparing Bone Meal Tea

Bone meal tea is just a fancy name for organic compost-containing bone meal. It’s an excellent health drink for plants deprived of nitrogen and phosphorous.
Bone meal tea is typically made by mixing one to two tablespoons of bone meal in every gallon of steeped manure or compost tea. The mixture is allowed to homogenize and achieve equilibrium overnight.
You can apply it directly to the soil or sprinkle it over the foliage. Watch this video to understand the process of preparing bone meal tea!
Nice article i love as im a farmer in Mozambique many thanks.
Can we use the discarded bones from our meal to do this?
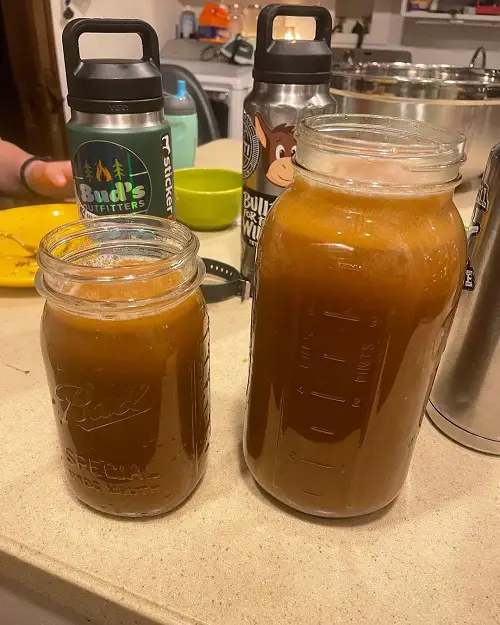
Yes. I save mine in the freezer until I have enough to cook up in the crockpot to make bone broth for me, and bone meal for my ‘green friends’!
So you are tellimg me that whan I throw my chicken and beef bone to the trash and go to the store to buy a 40$ bone meal pot is not the way to go!!! lol!
So I just boiled a whole bunch of beef bones to make bone broth–and now I can make bone meal for the garden from them. It’s a great idea! Adding vinegar helps break down the bone as well–might make it easier to grind. Also, after making bone broth most of the bones are pretty clean and probably good enough to break down, but I might still pressure cook them with some vinegar so I don’t break my blender.
Who is the author?
cool story
What happens if the bones aren’t Sparkling clean??
Your garden will smell like rotting meat until the scavengers come.
It will if you SKIP the essential step of removing ALL meat and fat.
Otherwise, not an issue.
What I tend to do when making my own bone meal, for example, after we have had one of chickens we processed for a meal.
I remove as much meat as possible and place it in a pressure cooker for stock for 1.5-2 hours.
The remaining meat/tendons etc. should just fall off the bones at that point. The bones are also pretty brittle at this point. A lot of the smaller ones will just snap.
Anyways, I then pop them in the oven at about 250 and bake them for 20-30 minutes to dry out. Sometimes you can hear them crackle after pulling them out.
You can pound them a little bit to make them smaller, but you should be able to just throw those in a blender/food processor and they will gladly turn to powderized form in about 15-30 seconds.
I make bone broth for consumption first.
1. Bake bones in oven.
2. Pressure cook the bones.
3. Pour broth off and run them through the pressure cooker a second time.
4. Put bones in dehydrator over night.
5. Beat the living crap out of the dry bones.
And I have been sending bones to the dogs..
Please don’t do that. Bones will kill dogs over time.
I find it easier to just pressure cook the bones. They turn to mush. You can also add other food scraps to the pot and make extra yum mush fertilizer…it negates all the baking, dehydrating and pounding to bits. Plus it saves tons of time..tome i cant use to wrote answers no one will read….oooooh.. if u don’t need it right away..toss mush into a compost pile or store in freezer.
I’ll buy a rotisserie chicken from Sam’s,
□ Take the meat off the caucus and save Gumbo, Jambalaya, chicken salad, dirty rice, etc.
□ Put all bones and scrapes in my Power XL Pressure Cooker and let it cook for 1-2 hours. Bones disintegrate (no need to grind), just take a fork and smash the bones.
□ Strain the bone broth and use it in my Gumbo, Jambalaya and Dirty Rice recipes.
□ Place meal in a plastic bag and flatten, then put it in the freezer. I will break off pieces and add it to my dog’s dry dog food.
Does anyone know if one can use (with intended effectiveness) mainly beef bones that had already been used for making bone broth? Or, are the nutrients completely extracted—if one has cooked them at a low boil for 24-48 hours? Thanks!
“How to eradicate all potential pathogens from bones”:
(via ChatGPT)
Eradicating all pathogens from beef bones to safely use them on crops requires a combination of methods that ensure thorough sterilization. Keep in mind that achieving absolute sterility might be challenging, but these steps can help minimize the risk of pathogens:
* Cleaning: Begin by thoroughly cleaning the bones, removing any remaining flesh or tissue. Use a knife or other utensils to scrape off any adhering material.
* Boiling: Boil the bones at a consistent rolling boil (100°C or 212°F) for an extended period. While there’s no exact timeframe to guarantee absolute pathogen eradication, boiling for several hours (6 to 8 hours) can significantly reduce pathogen levels.
* Pressure Cooking: Pressure cooking bones can achieve higher temperatures than traditional boiling, helping to destroy more pathogens. Follow the manufacturer’s guidelines for pressure cooking times and temperatures.
* Baking: Alternatively, you can bake the bones in an oven at a high temperature (around 350°F or 175°C) for several hours. This method can help kill pathogens through dry heat.
* Hydrogen Peroxide Soak: After cooking, you can soak the bones in a solution of food-grade hydrogen peroxide and water (1 part hydrogen peroxide to 9 parts water) for a short time (15-30 minutes). Rinse the bones thoroughly after soaking.
* Sun Exposure: If feasible, placing the boiled bones under direct sunlight for a day can help further degrade any remaining pathogens. UV radiation from the sun can be effective in killing microbes.
* Storage: Store the bones in a dry, clean environment to prevent recontamination. Consider storing them in sealed plastic bags or containers.
* Soil Incorporation: If using the bone meal as a soil amendment, consider incorporating it into the soil well before planting. The natural microbial activity in the soil can further help break down any residual pathogens.
* Monitor Plants: After using bone meal on crops, observe the plants for any signs of disease or abnormal growth. If you notice any issues, discontinue use and consult with local agricultural experts.