
Wondering what to plant in your fall garden? Mum’s the word! Here’s How to Grow Chrysanthemum from Cuttings in autumn, spring, and beyond!
From showy mums perfect for cut flowers to bouncy potted ones that instantly glow up your patio and windowsill, fall’s a great time to grow hardy chrysanthemums from tender softwood cuttings before the plant dies back for winter! It’s even more useful if you live in a warm frost-free climate, as this is a good to establish it before hot summer.
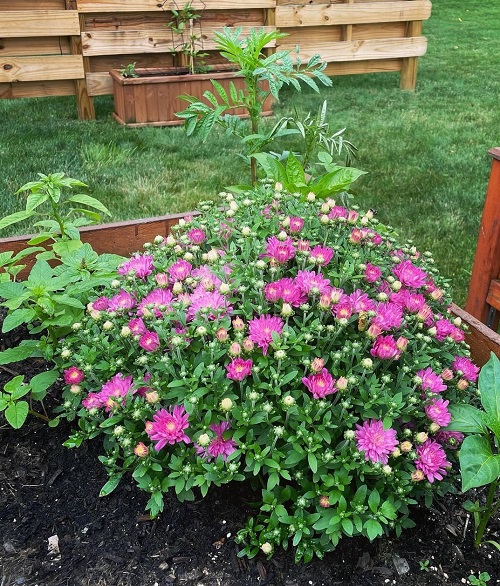
For a fall garden flushed with nectar-filled, fluffy, spherical daisy-like blooms next year, let’s dig into the workings of transplanting chrysanthemums this season and tips on caring through winter!
How to Grow Chrysanthemum from Cuttings?
1. Pick the Right Chrysanthemum Variety
 Focus on heirloom and hardy chrysanthemum varieties to propagate and transplant in the fall. Non-hybrid, “true” varieties typically tend to root well from cuttings and clone the parent in terms of blooms, growth habits, needs, etc.
And for fall, hardy perennial types are best suited to develop roots before frost sets in. You can propagate showy florist mums in a region with mild, warm winters, but these won’t survive extreme cold.
Mums are hardy to USDA zones 4-11, and their growing season usually falls in spring and summer. Go with late-flowering mums like ‘Clara Curtis‘ and ‘Sheffield Pink,’ which bloom into frost if you want flowers in the same season. They can set roots in fall, provide late nectar, and are excellent cut flowers!
2. Get the Cutting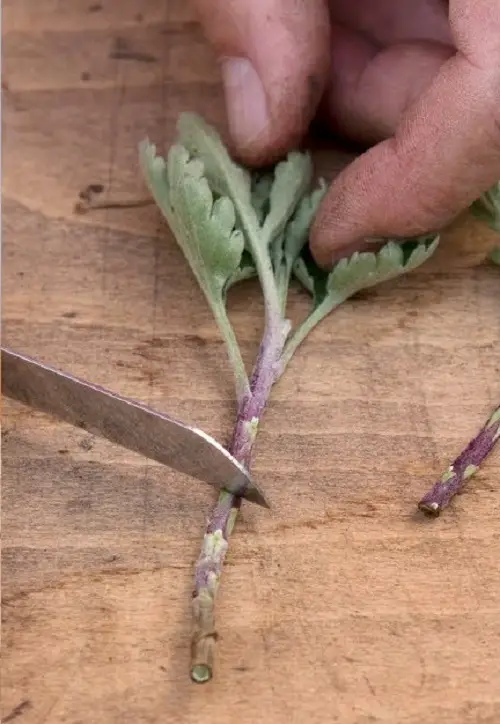
Now that you know the variety you wish to propagate, take a 4-6 inch softwood cutting from a healthy mother plant. Snip right below the leaf node and remove lower sets of leaves to help with rooting, keeping a pair intact on top.
The best time to snip a cutting is early morning when the plant is well-hydrated. Also, remember to water the mother plant the previous evening, so it is amply moist and won’t dehydrate instantly.
You can also use chrysanthemum stools from the previous year as a source of cuttings. Stools refer to the rooted bases of mums left in the ground after it has finished blooming for the season. Check out this video on how to grow mums from stools for a fall garden.
3. Dip it in a Rooting Hormone
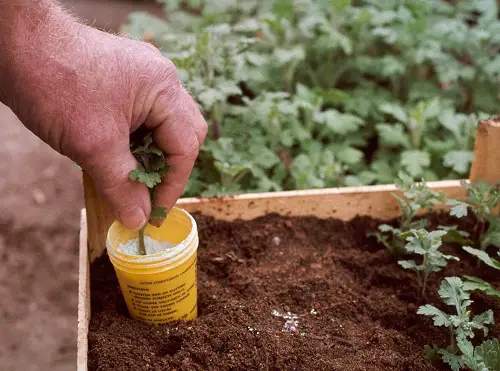
After cutting it, dip the sliced end in a rooting hormone to boost the plant’s ability to generate roots. While plenty of commercial rooting hormones are out there, we suggest homemade ones like aloe gel or honey. You can now start growing chrysanthemums from this cutting.
Tip: Cuttings do not have a 100% success rate, so it is better to take 2-3 cuttings and continue the process with all to increase the chances of getting a thriving plant.
4. Prepare the Medium
Chrysanthemums grow best in humus-rich, fertile, moist, well-draining soil. If you experience rain during fall, ample drainage is crucial for your mum cuttings to grow and form roots before winter!
Use a mix of coco peat, perlite, organic manure, and compost with a good potting mix, and either prepare your garden directly or fill it up in tiny containers.
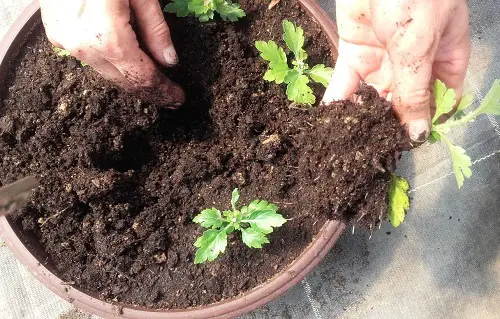
5. Plant your Chrysanthemum Cutting
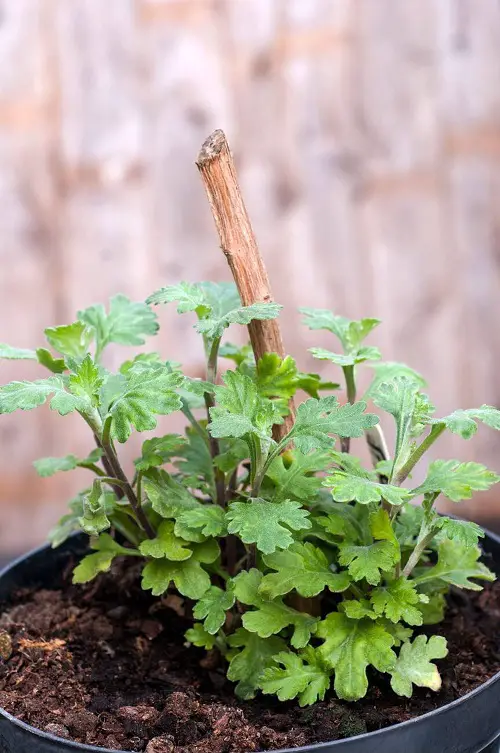
Next step in how to grow chrysanthemum from cuttings in the fall is to insert them an inch deep into the prepared medium and firm the soil around to keep them upright.
You can either plant the cuttings closely together without worrying about spacing or, if planting in garden beds, space the cuttings by about 12 inches, allowing ample room for growth.
If in pots, choose 4-6 inch planters to start your cuttings. You could use biodegradable pots made of coir or similar materials to avoid having to re-pot later. These will integrate into the soil below!
After ample shade for the first few days, provide the cuttings with dappled sunshine for at least six hours daily, keeping the medium moist but never soggy. Also, cover the cuttings with plastic film to boost humidity. For cuttings to develop, maintain temperatures of around and about 65 F (18 C).
6. Pre-Winter Steps
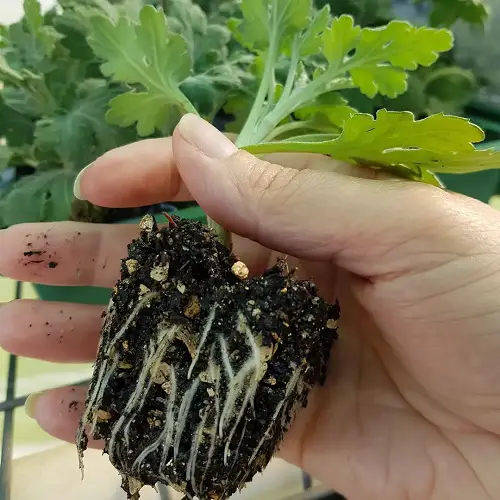
You’ll notice new growth within 3-4 weeks of planting your cuttings in the fall, as long as you did this at least 6-8 weeks before the first frost. However, remember these steps are about roots and rest and not yet about blooms!
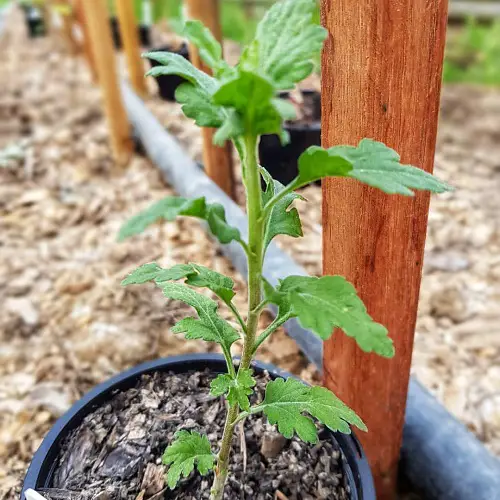
Once the cuttings produce 2-3 true leaves or grow to at least eight inches tall, you’ll need to move them to allow space for root growth. Whether you should plant your mums in pots or on the ground depends on the intensity of your winter!
If you live in zones 8-10 and above, where winters don’t drop below 20 F (-6 C), you can move your mums to the ground and provide ample mulch to insulate these fresh, tender roots. They will go dormant, survive winters, and revive in spring.
In colder regions, move these fragile first-year mum cuttings into bigger pots if they’re grown closely together and bring them indoors to a spot where they won’t freeze to death!
Caring for Chrysanthemum Cuttings
Knowing how to grow a chrysanthemum from cuttings also means learning how to care for one correctly so it turns into a thriving plant.
1. Sunlight
Most chrysanthemum varieties need at least six hours of direct sunlight to thrive and produce the best blooms.
In harsh climes like USDA Zone 9b and above, do remember to offer shelter from direct afternoon sun. Even these hardy, drought-tolerant plants don’t enjoy getting burnt!
However, into winter dormancy, they don’t need much light. In fact, exposure to too much light may wake them up prematurely! So, a dimly lit spot with less cold drafts or indoors works well during their hibernation phase.
2. Watering
Water thoroughly right after planting cuttings in the fall and throughout the period when they are setting roots. Always keep the soil slightly moist but never soggy! As winter arrives and your mums are getting ready to ease into dormancy, pull back on watering.
If planted outdoors with plenty of mulch, just check beneath and only water sparingly if it feels too dry. And into dormancy, stop watering until the soil requires moisture, as the plant isn’t growing now. By tapering off water into winter, you allow the cuttings to harden off and rest.
3. Fertilization
For mum cuttings propagated in the fall, there is no need for feed! A mature plant may benefit from a liquid fertilizer with an NPK ratio of 20-20-20 diluted to half during the growing season. This is around early spring, right before a few buds begin to form.
However, fertilizing into dormancy will upset the plant’s natural rest cycle and distract it from growing roots, prompting it to focus on foliage instead!
4. Pruning
After transplanting, you don’t need to prune the cuttings, since they are still forming roots. You can pinch off any early flower buds to refocus all resources into forming healthy, strong roots for winter!
However, as your mums enter spring, prune away dead stems and dried-up branches. And with older mums, do not be stingy in deadheading spent blooms, as this will only help produce better and more flowers!