
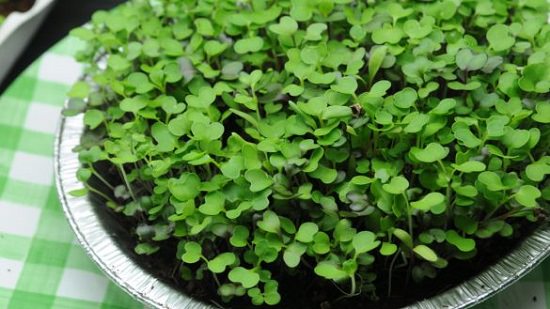
The supernutritious microgreens are very easy to grow and don’t mind the space. Surely, the best crop for urban gardeners. Learn how to grow them successfully with these Microgreen Growing Hacks!
Microgreens are the first set of leaves also known as cotyledons. They are not the true leaves of plants. However, microgreens can be harvested between cotyledon to first true leaf stage, when 3-4 true leaves appear, and they grow above 2 inches tall.
Also Read: Everything about Growing Microgreens
Choose the Right Home
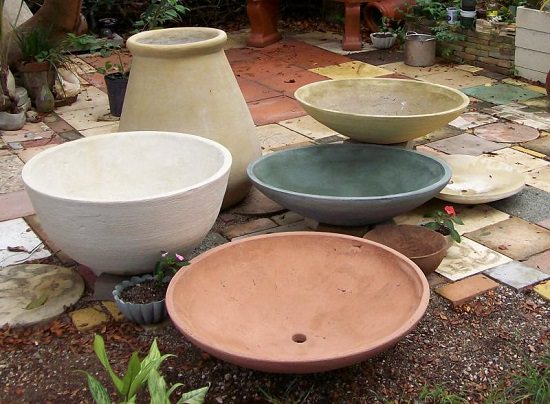
- Shallow containers that are wide with ample drainage holes are suitable for growing microgreens.
- Plastic or resin ones are better because they are lightweight and easy to move around.
- Fill up the container with soilless potting mix while leaving some space from the rim.
- If you want to grow microgreens indoors, consider filling up a shallow tray with the right soil before sowing the seeds.
- In the garden, you have a larger area to work with. Use bricks or stones to create the side-border and make sure it is high enough to contain the root of these baby plants.
Make Your Own Soil
- Making your own microgreen soil mix gives you greater control over the harvest quality. Ideally, a combination of 1 part perlite, 1 part sand, and 3 parts peat moss or coconut coir (coco peat) works well.
- Remember, all the nutrients that the microgreens need are reserved in the seed, so all you’ll ever need is a light soil mix like this to grow them.
- You can also use seed mix to grow microgreens.
pH Level for Microgreens
Growing medium or water you use should not be too acidic or alkaline, most of the seeds grow well in the pH range of 6-7.5.
Use Organic Seeds
There are no special types of microgreen seeds but it is advised to use untreated seeds and for the quality, try to give preference to Non-GMO, organic, and heirloom seeds.
Microgreen Sowing Hacks

- Fill shallow trays that are at least 3-4 inches deep with seed starting mix and scatter the seeds generously, don’t mind spacing.
- Maintain 2-inches space between rows and mist them evenly.
- When seedlings sprout, place the trays in indirect light.
- Later, keep them by the window or beneath the grow lights for at least 6-8 hours a day, if growing indoors without the natural light.
- Don’t use incandescent bulbs and turn off the lights after sunset. Plants need the dark period to grow.
- For optimum growth, 3-5 hours of direct sunlight or a minimum 8 hours of bright indirect sunlight is required.
- If you’re living in a hot climate, exposure to the light morning sun and day-long bright sunlight is enough.
- Some microgreens require very low light for the growth, you need to experiment to find them out.
Microgreen Growing Hacks
- Ensure the pots you use are clean and free of dirt and mold.
- Use a separate pot for each microgreen crop. Label the pots to identify the baby plants.
- To avoid disturbing of the roots, instead of pouring water from the top, do the bottom watering.
- Usually, you don’t need fertilizer to grow microgreens. Seeds can provide enough nutrition for the growth.
- Some fastest growing microgreens and long growing microgreens may take benefit from light fertilization as they exhaust their self-contained nutrient supply in the seeds, during their growth.
Water Wisely
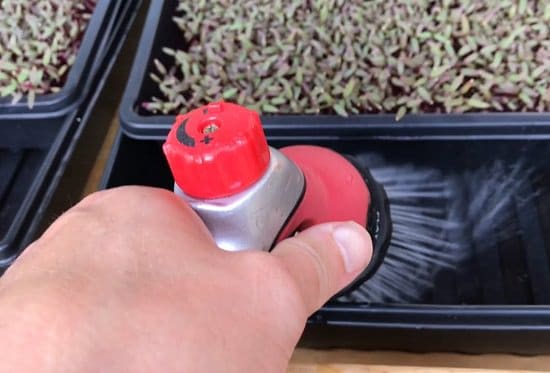
- If you’re planting microgreens outdoors, mist the water carefully or use a sprayer.
- Know that watering is crop-specific. All microgreens don’t have the same water requirements.
- Container-grown microgreens require more frequent watering.
- In general, keep them well-watered and moist, but not soggy.
- You can mist water once in early morning and once in the afternoon.
Harvesting Microgreens
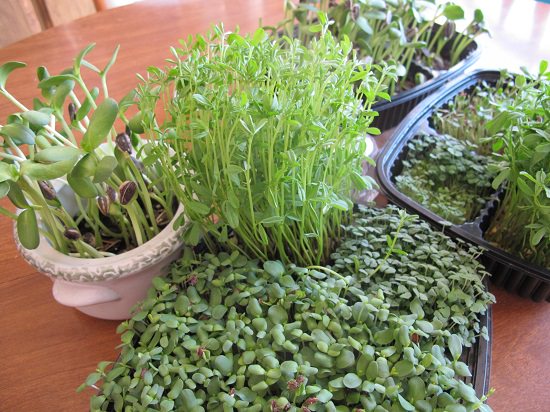
- You can harvest microgreens at 2 stages–When the first set of leaves appear (cotyledons) or when the seedlings have 3-4 true leaves, and they are above 2 inches tall.
- To harvest, use a pair of clean scissors to snip off young leaves gently above the soil.
- Or, pull the microgreens along with roots, wash them well and enjoy. You can consume them whole.
Common Problems with Organic Micro-Gardening
1. Mold/Fungi
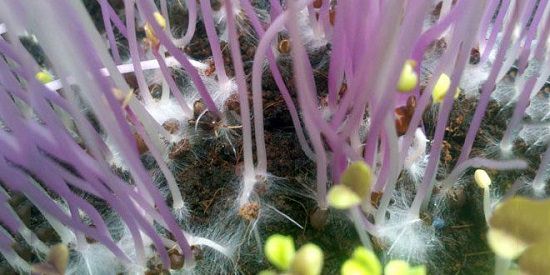
Mold resembles white, spidery strands entangled with the expanding roots. It begins as a tiny mass of hair and quickly spreads all over the surrounding soil. High temperature (above 70 F) and humidity are the major triggers.
Thankfully, you can eliminate mold right at the start while planting. Aerate the soil well and improve air circulation by removing windbreakers. Make sure your trays are clean and dry before planting, and use fewer seeds, especially if they’re mucilaginous in nature.
A mixture of water and grapefruit seed extract works as a nice organic tonic to deter fungi.
2. Prolonged Germination Time
Microgreens take anywhere from 3 to 7 days to germinate. If you see slower germination, increase watering, and take a germination test of your seeds.
3. Yellowish Microgreens
Place your microgreen trays near the light source to facilitate photosynthesis and normal leaf color. Take out the blackout dome earlier or else all your seedlings will turn yellow.
4. Clustered Microgreens
Getting a uniform spread is difficult when you’re working with mucilaginous seeds. If you plant too many seeds together, they will overcrowd and compete with each other and reduce the harvest. Ensure spreading the seeds evenly on the tray and use fewer seeds.
5. Poor Growth
Now that can occur due to a host of factors. Usually, it’s either due to improper moisture control, or poor seed preparation. In general, the following tips can help:
- Follow the guidelines on the seed packets carefully
- If using domes, take them out at different times for different microgreens.
- Do not deviate from the recommended watering schedule
That pic of white fuzzy mold is actually not mold, it’s the new root system! White strands with white fuzzy hair roots. Mold is also white but has no central structure!!