
Learn How to Grow Monstera from Cuttings in easy steps and propagate this stylish plant with perforated cut foliage at your home fuss-free!
The best part about growing a Swiss Cheese Plant is its easy to multiply nature. Let’s have a look at How to Grow Monstera from Cuttings at home easily!
Here’s all you need to know about getting split leaves on Monstera
How Long Does It Take to Propagate Monstera Deliciosa?
It’s fast but the duration to propagate depends on the weather, propagation method and the health of the cutting. Generally, it will take anywhere between 4-8 weeks for the cutting to have an established root system. But how early or fast depends more on weather conditions and climate!
Have a look at the most beautiful variegated Monsteras here
When to Propagate a Monstera?

Though you can propagate monstera at any time of the year, for best results, take cuttings when the weather is moderately warm, i.e., in spring or summer. The plants usually have a higher success rate during this time period.
Have a look at the best types of Monsteras here
Ideal Size of Cutting for Propagating Monstera Deliciosa
Make sure the cutting is at least 5-7 inches long, healthy, devoid of any diseases, with 2-3 leaves and at least one node. The cutting must not have too many leaves, damaged or rotten.
Monstera leaves turning yellow? Click here to save your plant
Where to Make a Cut for Propagating Monstera?
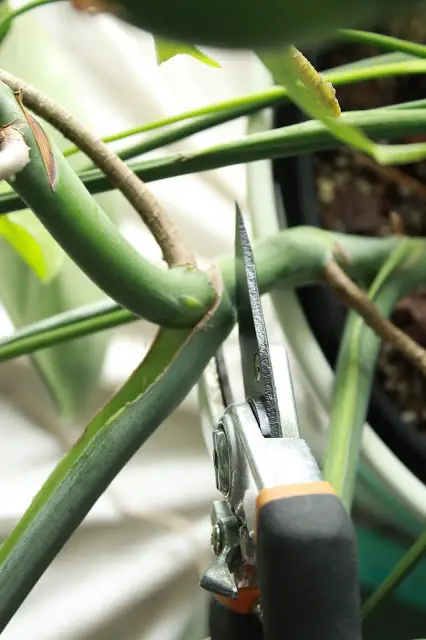
To successfully propagate a monstera from cutting, follow a simple rule of taking a cutting right below a node or aerial root. The node is a bumpy point where the leaves or the buds appear and join the stem.
Within the node is a bud, which is an area of great cellular activity and growth. This is where the new roots form, this is why every cutting you take must have at least a single node.
Read about the secret for lush Monstera here
Type of Cutting You Need to Take to Propagate Monstera Deliciosa?
Let’s understand the basics of monstera cuttings:
1. Top Cutting
Top cutting is the simplest to take, where you snip away the top part of the stem, along with the terminal bud, which is the growth point. These are the fastest to root.
2. Mid Cutting
After taking the top cutting (5-7 inches) you have an option to snip away the middle one too. Make sure you take it with its node as that’s the point where it will start new growth.
3. Cutting with Just a Node
As the name suggests, this one has only the stem with one node with no leaves whatsoever. It takes the most time to root.
Stages of Propagation in Monstera
-
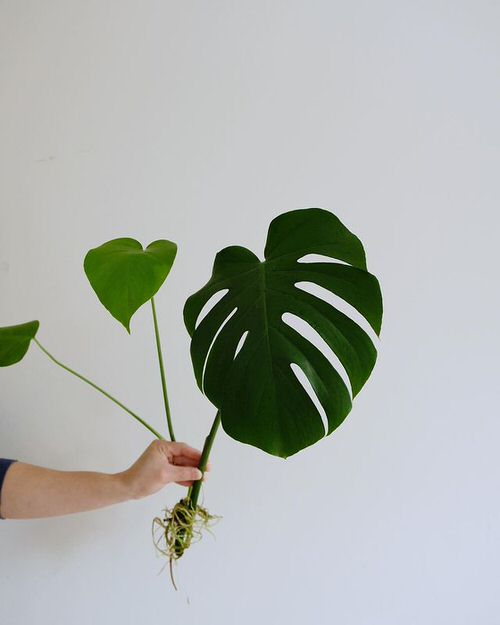
Fresh Cutting
This is the first stage when you have just snipped a cutting from the plant, and it has no roots. However, it might have aerial roots that are of no use as they won’t be able to sustain the plant on its own.
It is important that you root the cutting immediately after snipping it from the plant as it will slowly start to die like cut flowers.
-
Rooted Cuttings
As the name suggests, these are ones that have grown a set of fresh roots, which are generally fuzzy and white in color. These are important as they make sure the cutting gets all the nutrients it needs to grow into a healthy plant.
-
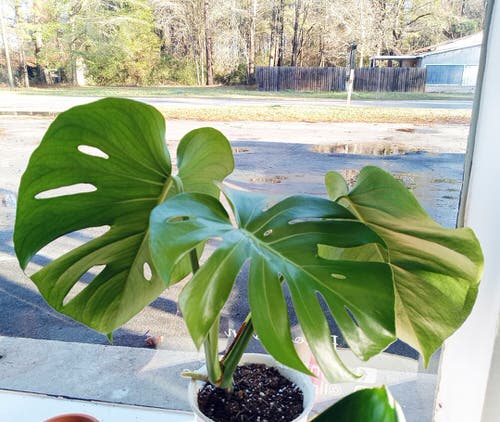
Established Cuttings
This stage signifies that the cutting has started to become a plant on its own and now it can be translated to a bigger pot or into a garden. This is also the stage where the cutting starts to grow new leaves on its own.
Monstera leaves curling? Here’s how you can save them
How to Grow Monstera from Cuttings?
1. Take a Cutting
Choose a healthy stem, and using clean, sharp shears–make a cut right below the node. Make sure not to damage the plant and the cutting in the process.
2. Planting
Take a 6-8 inches pot, fill it with a well-draining potting mix, dip the cutting in a rooting hormone, and plant the cutting. Do not bury it too deep in the soil—1-2 inches would be just fine to cover the node. Secure it by patting the growing medium around it gently.
3. Watering and Caring
It would be a good idea to mist the cutting and not pour water all over the growing medium so as not to dislodge it. At this stage, the cutting is quite sensitive and has not been rooted properly, and using a watering can would disturb the cutting from its position.
Mist the soil evenly using a spray bottle. You can also mist the leaves once in 4-6 days.
When it comes to light exposure, avoid keeping the cutting in direct sun. It’d be best to let it bask in the indirect and bright light all day long. Avoid keeping the cutting at a very dark spot, either.
4. Formation of Roots
The roots will form in 5-7 weeks, but you will have to wait for at least 2-3 months as it will take this much of time for the plant to establish a solid root system.
5. Keep the Cutting Covered
If the weather is not warm and humid, you can do this to increase your chances–keep the cutting covered with a plastic bag or place it inside a mini greenhouse. This will help to maintain the humidity level, which for Monsteras is best at above 40%.
Keeping an Eye on the New Plant
At this stage, it is important that you are not letting the soil dry out completely at any point in time.
It would also be a good idea to feed the plant with a balanced liquid fertilizer, diluted to 1/4 of its strength, once in 2 weeks. It will help in boosting the rooting process, aiding the plant to grow robust and healthy.
Propagating Monstera in Water
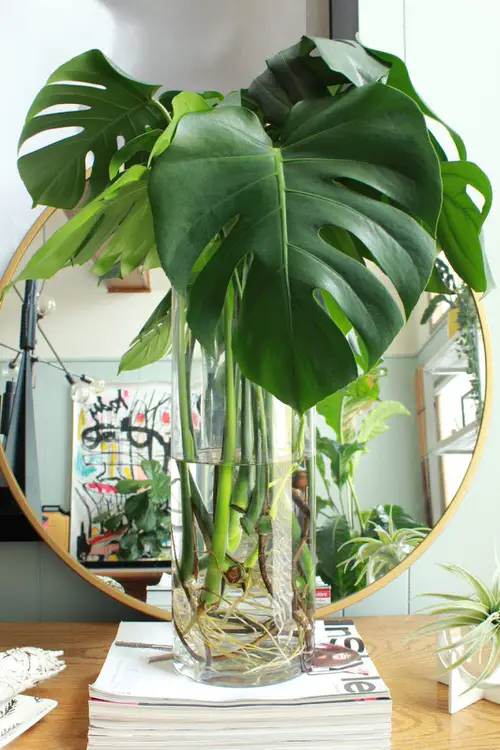
You can also grow the monstera cuttings in water. Position them in a jar or vase in a way that they remain upright. Getting a tall and narrow jar will help in this purpose. Also, use non-chlorinated water.