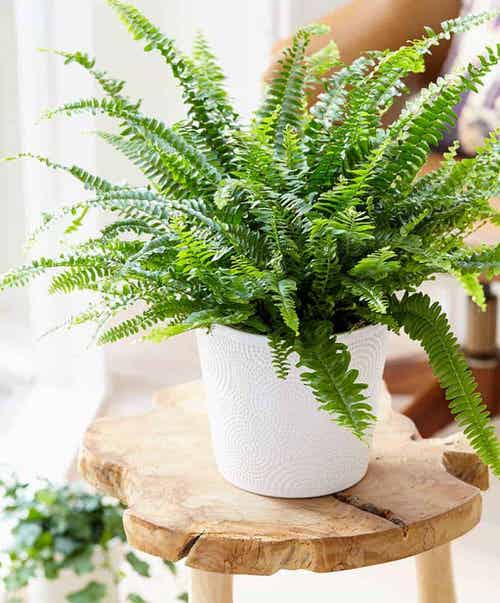
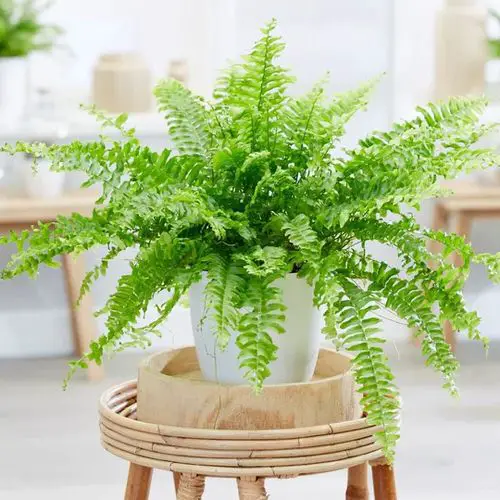
Want to know How to Get Your Indoor Fern to Look Like This as you see in the pictures? Read on to learn the best tips and tricks for it!

Pictures can be deceiving, but not when you are at the Balcony Garden Web! Here are the secrets behind how to get your indoor fern to look like this, as you can see in this snap!
Learn how to grow ferns from ferns here!
How to Get Your Indoor Fern to Look Like This
1. Set the Fronds Free
While growing ferns, make sure their fronds have enough room to grow and spread. Avoid keeping the plant in the corner of a room or close to some wall, where its growth can be hindered.
Also, do not crowd it too much with other plants. The best is to either grow them in hanging baskets or stands, which tenfolds the beauty, or pick a place where they have at least 2-4 feet of open space at all sides to spread freely with plenty of air circulation.
2. Feed Correctly

Use a 20-10-20 liquid fertilizer, diluted to 1/4 of its strength, once every month in early spring to mid-autumn. This will ensure they keep their deep green color, texture and stay lush.
As these plants do not actively grow during the winter months, it’d be a good idea to stop feeding them during that time.
3. Take them to Bathroom
Being tropical plants, ferns love humidity, and what could be a better place than a bathroom with a big window to keep them lush and green?
Ferns do best in humidity levels between 40-50%, and such places will take care of their humidity just right.
You can also mist the foliage twice a day keep its pot on a tray filled with pebbles when the air is dry around them.
Check out the best hanging ferns here!
4. Not too Cold, Not too Hot

Ferns do well in the moderate temperature range of 60-85 F (15-30 C) and a little warmer and a little cooler. They can handle temperatures down to 55 F (12 C) easily, which is why it would be best not to expose them to temperatures below 50 F (10 C).
Also, in winter, keep them away from windows and doors, where they could catch cold drafts. Make sure the plant is away from fireplaces, A/C, and heating vents too.
5. Keep them Hydrated
Ferns absolutely love constant hydration in nature. So, if you are someone who is always worried about getting your houseplants watered, then ferns are your best friend!
The best way to ensure the plants look as lush in your home as in pictures is to keep the growing medium slightly moist. Do not let it go completely dry between watering spells. Water the plant deeply till it starts to seep out of the drainage holes, but only when the topsoil feels a little dry to the touch.
Pro Tip: If you are a laidback gardener, then grow rabbit’s foot, Japanese holly, or brake fern. They don’t mind getting their soil to go dry between watering.
Learn everything about growing ferns in water here
6. No Direct Sun
Avoid placing the ferns in direct sunlight. It will bake their foliage, and you won’t have them as beautiful as they should look.
Choose a spot where they will get plenty of filtered or indirect and bright light all day. If you have a bright balcony or a patio, you can keep them there, or how about using them as entrance plants on the front door.
7. Don’t Keep them Rootbound
It’s not a good idea to keep the ferns in a root-bound state like succulents; they don’t appreciate it. If you see the pot looks too small for your fern and you notice stunted growth, then it’s time to give it a new home!
The best time to re-pot the plant is when the weather is warm, for example, spring or summer. Also, make sure to use just a 1-2 size bigger pot than the old one. If you see the rootball being too crowded, then it’d be a good idea to divide the plant—this way, you’ll have more of them in your home.
8. Pick the Right Fern

Picking the right fern is the key here if you want to showcase their real beauty. The best one to go for is the Boston fern and its different types, like Fluffy Duffy,’ ‘Florida Ruffle,’ and ‘Hawaiiensis.’
Rabbit’s foot, Kangaroo paw, Maidenhair, Crocodile, Staghorn, Lemon Button, and Silver brake are some of the best ferns you can grow indoors.
9. Group or Divide the Plants
After you get a large plant from the garden center, it would be a good idea to divide it. Make divisions and plant them on each side of a large pot to make the plant look bigger and bushier when it grows.
You can also group 2-4 pots of the same ferns together. This will also create a micro-climate-like setting for them.
10. The Real Beauty Lies in the Way You Display It
If you really want to make your fern stand out as a centerpiece, then make sure you display it in the right manner. For this, use a tall plant stand to help its fronds tangle down beautifully while the plant gets a strategic height to reach eye level.
Some other ways to make their beauty stand out are growing them in hanging baskets, displaying the pots against contrasting accent walls, growing them in incredible pots and terrariums.
Get the best tips on growing Bird’s Nest Fern here
The Best Kept Secret for Lush and Green Ferns!

Epsom salt can do wonders in making ferns lush and green. It contains 10 percent magnesium and 13 percent sulfur, which helps in chlorophyll production, healthy plant growth, and resistance against pests and diseases.


