
Growing Orchids from Seeds will not be difficult if you know these expert techniques and tips. Check it out!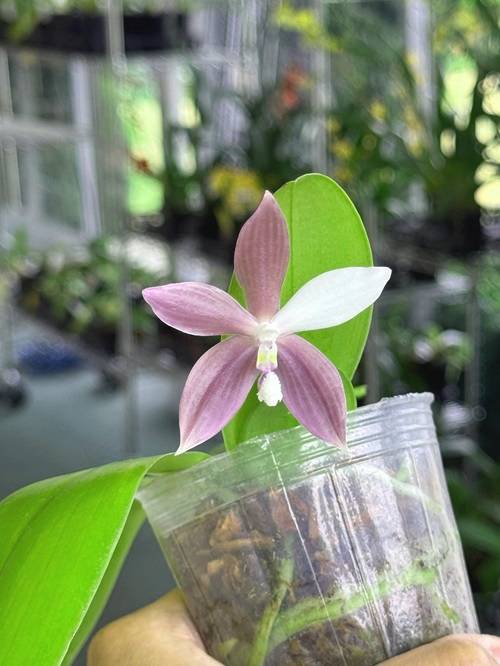
Found everywhere on earth, this elegant flower is one of the most coveted houseplants for beauty. But how do you get started with orchids? Producing some of the tiniest seeds ever, that too mostly dormant, growing orchid seedlings is no walk in the park!
It needs patience, precision, and a whole bunch of other things. But for the strong-willed gardener, we show you how to grow orchids from seeds and turn them into thriving plants.
How to Grow Orchids From Seeds
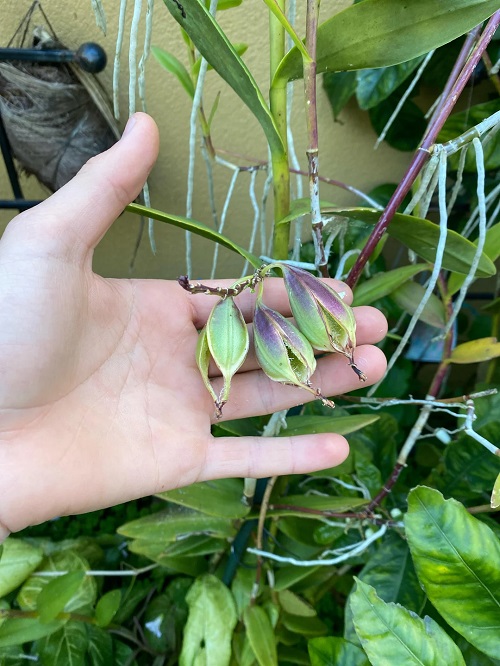
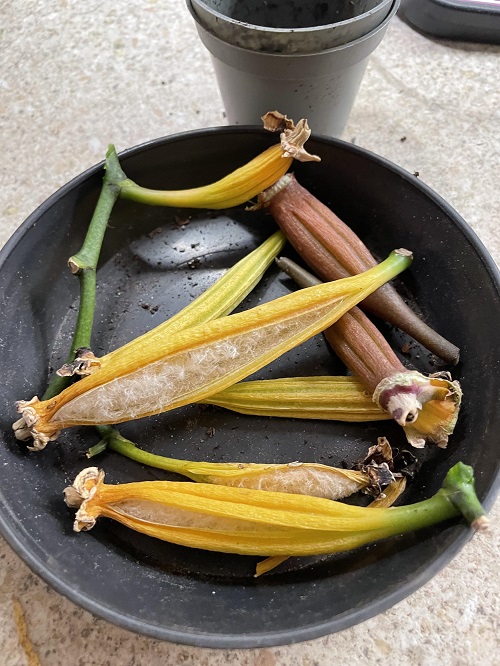
Orchids disperse millions of speck-of-dust-sized seeds, most of which go to waste. Typically, its seeds lack a food reserve called endosperm, which is needed for germination. In the wild, orchids often work with fungi that help feed and develop seedlings.
For these reasons, its seeds need a sterile, lab-like setting and a special growing medium called “Orchid Agar” to germinate. This method is known as flasking, but more on that later. Even if they manage to sprout, the next step of growing orchids from seed can take a lot of time.
Daunting? Don’t worry, we simplify the process for you!
How Long Does it Take to Sprout Orchid Seeds
Growing an orchid from seed to bloom often takes up to four years. A seed pod usually matures in 80-250 days and is then sown in a flask. Here, it develops into a spherical bulb of sorts over three months, officially known as a protocorm-like body (PLB).
In the next three months, these PLBs grow from small to medium to large, finally reaching their vegetative stage that lasts about 6-15 months. Don’t panic—we told you it takes time!
Orchid Varieties That Can Be Grown From Seeds
Now, we know it’s a challenge, but some varieties are more amenable than others in growing from seed. For instance, terrestrial orchids that root in soil rather than air or water are often considered better candidates for seed germination.
You can totally experiment with varieties like Lady’s Slipper, Calanthe, and Bletilla. Now that you’ve picked the variety you wish to grow from seed let’s dive into the actual steps involved!
Meanwhile, check out these orchid varieties with amazing foliage!
Growing Orchid Seedlings
1. Cleaning the Seeds
The first step in growing orchids from seed is to sterilize your setting thoroughly. Everything begins here, so you absolutely cannot risk contamination. All equipment, including flasks, forceps, scalpels, and even your hands, have to be squeaky clean!
Then, add the filter paper envelope containing dry seeds to a sealed container with 1 cm of 3% hydrogen peroxide and shake it well. Now, allow the mixture to rest for about half an hour. Carefully decant the liquid, and you’ll have clean seeds.
2. Preparing the Growing Medium
Orchids are special, and a regular potting mix or soil won’t be enough. You’ll need a nutrient-rich agar medium. To prepare it, you’ll need agar powder, distilled water, macronutrients, micronutrients, and vitamins. While there are several recipes out there, we recommend this video tutorial for the best and easiest ones!
To begin, combine agar powder with distilled water to form a solution. You can sterilize it in a pressure cooker or an oven at 300-350 F for about 15 minutes. Once it’s ready, store it neatly in sanitized containers and wait for the solution to turn into gel. If all this is too much for you, simply buy an agar medium for orchids from reliable sources.
3. Inoculation and Incubation
In this step, we introduce the seeds to its agar gel medium. Use sterilized tweezers to place the tiny seeds on the surface of the agar medium inside the flask. Then, seal the flask and keep it in an incubator, or use a seedling heat mat or grow lights if you have one.
You can also go the old-fashioned way and keep it in a warm room or a plastic storage box while maintaining the temperatures mentioned below. Some even store it in an oven with just the light on, but don’t accidentally bake it!
For seedlings to sprout, the ideal temperature should be around 68-77 F (20-25 C) with moderate to low light and high humidity. In this stage, aim for about 12-14 hours of diffused indirect light daily and avoid direct sunlight. And don’t add extra water to the gel, as the agar medium already has ample moisture, and the sealed flask helps retain humidity.
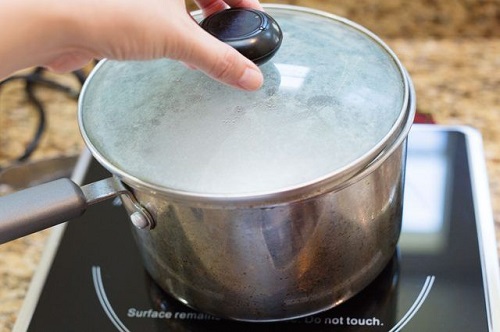
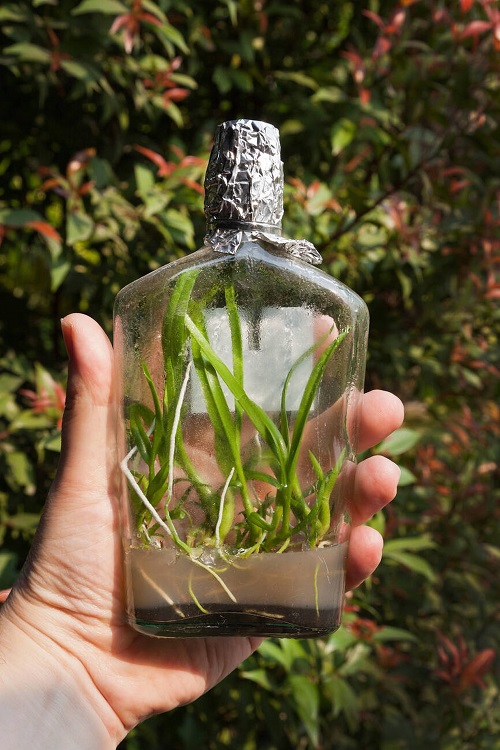
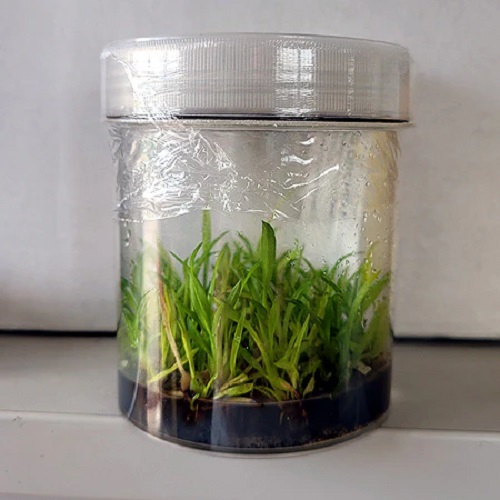
Pro Tip: Temperature and air pressure fluctuations can hamper everything you’ve done so far! To avoid this, consider using threaded flasks, such as spice bottles, baby food jars, or mason jars.
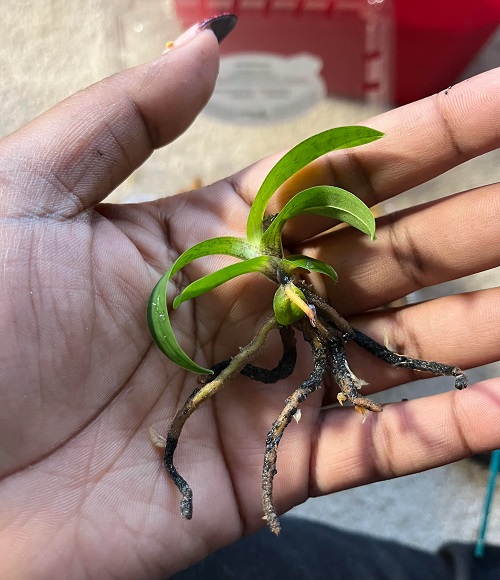
4. Transfer the Seedlings
Once the seeds sprout roots, it’s time to move them to a potting medium. Wait until you can see roots and multiple leaves before transplanting them. Depending on the orchid’s variety and size, this can take up to a year.
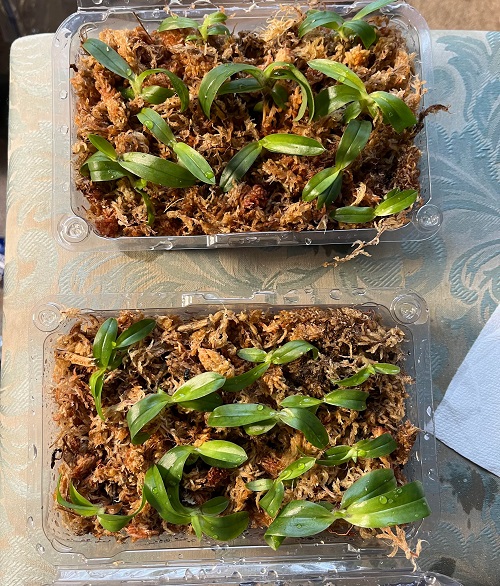
Next, we come to the potting mix. Orchid seedlings prefer well-draining, airy soil that is slightly acidic. Use a blend of sphagnum moss and perlite or fir bark and charcoal.
Then, we remove the seedlings from the agar flask, ensuring the roots have no gel residue. We add the potting mix to a new sterilized flask but allow for some ventilation in this one to avoid mold. Carefully plant the seedlings in the new medium, making sure to cover the roots.
Don’t water too much while the roots develop. Only if the medium starts drying out should you mist it gently, though this is unlikely as sphagnum moss holds moisture well. For the initial weeks, give it 12-14 hours of indirect light and humidity as the seedlings get used to their new home.
5. Deflasking Orchid Seedlings
It’s finally time to deflask your orchid seedlings. In about a year, your seedlings will have robust, healthy roots, multiple leaves, and a plant size of about 1-2 inches, and that’s when you know it’s ready! Monitor your seedlings closely for signs of overcrowding, weakness, or fungal growth within the flask, as these can indicate the need for earlier deflasking.
Unscrew the lid a bit, then do the rest of it after a gap of 2-3 days so the orchids can harden off a little before they’re removed. Remove the plants gently and swish them slowly in mildly lukewarm water so the orchid soil washes off their roots.
The choice of pot and potting medium is crucial for your seedling’s survival. Small, clear plastic pots with ample drainage are ideal for young seedlings. Avoid terracotta pots, as they can wick away moisture too rapidly. Use the same potting mix as above, and if the pot is too deep, place bark or pumice at the bottom before filling it up.
After holding back for weeks and months on end, this is the moment we’ve all been waiting for. All that’s left to do is to plant the seedlings in their new pots, admire, care, and watch them grow!
Caring for Orchid Seedlings

Orchid seedlings need proper light and water to grow, among other things. Follow these tips, and your orchid will mature happily.
- Aim for at least 4-7 dry days depending on the surroundings, and water around it carefully to nourish the roots, but avoid the foliage. Adjust watering based on the growing medium’s condition.
- Provide bright, indirect light and maintain temperatures between 68-77 F (20-25 C)
- Use a balanced fertilizer, like MSU orchid fertilizer, at a quarter of its strength. You can also try these DIY orchid fertilizers.
- Prioritize good drainage to prevent rot for all orchids. Phragmipediums are an exception, as they need consistent moisture.