
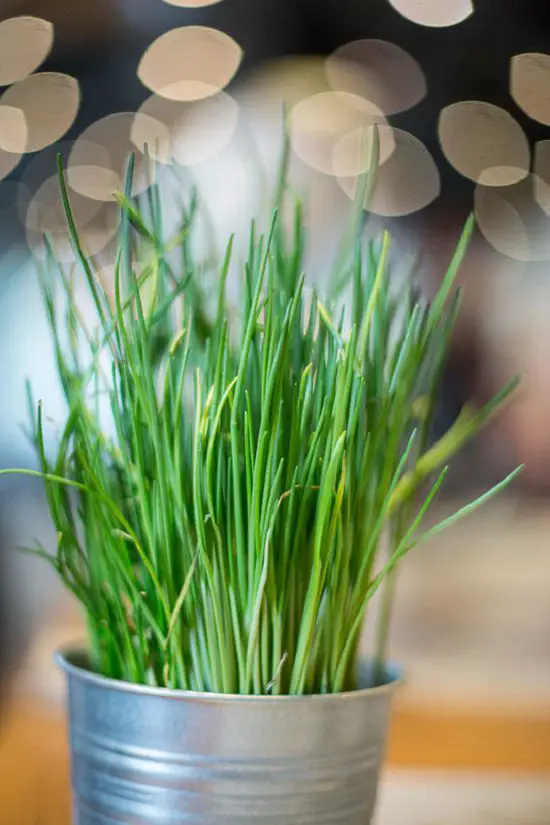
Learn Growing Chives in Pots without much space so that you can have fresh scapes of this versatile herb in your salads, pasta, scrambled eggs & sandwiches.

Chives look similar to green onions and taste between mild onion and garlic. Its purple to mauve flowers set the difference. Some people call it “blue jeans herb” as it can go with anything.
Also Read: 12 Versatile Vegetables & Herbs for Containers
Even if you live in an apartment, you can have this herb as growing chives in pots is super easy. You can plant chives indoors as well as it doesn’t mind living in partial sun. A windowsill that receives direct sunlight would be fine.
Botanical Name: Allium schoenoprasum
USDA Zones: 3-11
How to Grow Chives
You can grow chives from seeds or get the young plants from the nursery. Once the plants are well established, you can multiply them by division.
Growing Chives from Seeds
Growing chives this way is not difficult, but if you’re growing anything from seeds for the first time, it’s better to buy ready to grow plants from a nearby nursery:
- Start sowing seeds indoors one month before last expected frost date or wait for the warm weather to arrive to start seeds outdoors.
- If you’re living in a hot climate, grow chives after the summer.
- Best seed germination temperature is between 60-70 F (15-21 C). But you can grow seeds in the temperature range of 50-85 F (10-30 C).
- Sow seeds 1/4 inch deep in the seed mix, and keep them in a warm spot that receives indirect light.
- Generally, you see the seedling appearing in 1 to 2 weeks (depends on the weather condition), and they’re ready to transplant in 3-4 weeks or 2-3 inches tall.
Growing Chives from Division
This method of propagation is more common, easy, and requires division of clumps:
- Find an established plant, which will be actually several chives plants growing together.
- Water your chive plant well to soften the soil around it.
- Dig from the sides of the clump without damaging the delicate root system and bulbs.
- Separate young little plants from the main clump gently to form new clumps.
- Each new clump can have 3-5 plants, and you can plant them together in 8 inches wide and deep pot.
- You can divide chives in spring, late or after the summer, and in fall (autumn). After flowering, fall is the best season to do this.
Also Read: Herbs You can Grow from Cuttings
Types of Chives
There are different types of chives to choose from, and it all depends on your needs to select one:
Onion Chives or Common Chives (Allium schoenoprasum): The most popular and commonly known type of chives. It usually grows up to 10-12 inches tall. As the name suggests, chives taste like mild and raw onion. The delicate flavor makes it an excellent addition to salads, omelets, and anything you want them to add in. *The flowers are also edible.
Garlic Chives (Allium tuberosum): Also known as Chinese chives, it’s usually grown for culinary purpose and can be up to 12-24 inches tall, larger than common chives. The leaves are used in cooking, usually in stir-fries, meat dishes, and salads. The taste is sharper than chives and much similar to garlic. Its white flowers are also edible and attract bees and butterflies.
Giant Siberian Chives (Allium ledebourianum): It’s a variety of chives that’s larger in size than the other ones and grows to around 18-30 inches in height. Flavored like an onion, they can be added to various dishes or used as a border plant because of their size.
Blue Chives (Allium nutans): Also known as Siberian chives, this species of chives usually grow up to 10-12 inches in pots and prefers moist soil. It has blue-green leaves, thus the name. You can grow it in small pots–the flavor is mild garlicky.
Also Read: Types of Oregano
Choosing a Pot
Select a pot that is at least 8 inches wide and deep. You can grow several chives plants in such pot, usually 5 to 6 young plants together. This will form a small clump, which will become bushier after some time. Once you see your pot is overcrowded, split the plants to multiply them. Grow chives in 3-4 pots, so that rotate the harvest and have this herb successively, fresh and flavorful.
Tip: If you’ll grow an individual plant in each pot, it’ll take forever to become thick and bushier, so avoid that.
Also Read: How to Grow Rosemary
Requirements for Growing Chives in Pots
Location
At least six hours of sun a day is required for optimum growth, so place it at a sunny spot. When growing chives indoors, keep the pot in a south-facing window. Chives can grow well in part sun, receiving 4-5 hours of direct sunlight, especially in hot tropical climates.
Soil
Use light and porous potting soil for growing chives. You can treat it with aged manure or compost, mixing 1/4 of it at the time of transplanting would be fine. This will improve the texture and nutritional value of the soil.
Watering
Do regular watering to keep the soil slightly moist. To avoid overwatering, the golden rule of thumb is to check if the topsoil is dry before watering.
Water thoroughly and deeply, allowing the excess water to drain out from the bottom of the pot. When using it as an ornamental plant, you can cut back watering to promote blooms near the flowering season.
Tip: In winters or during the wet weather, reduce watering.
Also Read: Best Way to Water Plants
How to Care for Chives
Fertilizing Chives
As the nutrients in the soil deplete over time in pots due to regular watering, it’s important to feed this perennial herb from time to time:
Organic Fertilizer
If you mixed compost at the time of planting, again side dress your plants with it during the mid-season. If the plant needs a boost, feed that with organic fish emulsion fertilizer at the recommended dose on the product.
Inorganic Fertilizer
If you’re not using organic fertilizer, apply half-strength complete liquid fertilizer like 20-20-20, once in every 2 to 4 weeks, depending on how your chives plant is performing.
Deadheading and Pruning Chives
Deadhead the spent flowers regularly as soon as you see them, to maintain the fresh look. Chives will be ready for harvest in 60-90 days after planting, regularly trimming the leaves for harvest will do the work, and you won’t need to perform the substitute pruning. Prune fading and yellowing leaves and scapes anytime. If you need, the proper time to prune is between mid to end of the fall. Learn more on how to prune herbs here.
Pests and Diseases
Common garden pests such as spider mites, mealybugs, scales, aphids, and whiteflies can affect this herb. If any such infestation occurs, spray the chives with insecticidal soap every week till the problem persists. Root rot can also occur but can easily be avoided by proper watering technique.
NOTE: Wash the chives thoroughly before using it in your kitchen as traces of insecticidal soap might remain on the leaves.
Harvesting
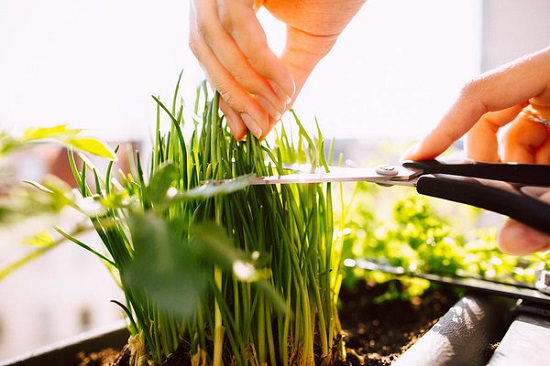
Chives are ready for harvest as soon as they grow above six inches or more in height. Snip of the leaves from the top using sharp scissors and use them fresh in your cooking. Make sure to leave at least two inches of the plant intact from the bottom. You can also freeze the leaves by placing the chopped leaves in a plastic container. Flower stalks lack flavor, and it’s up to you to cook them or not. Check out these tips to harvest herbs successfully.