If you want to know the easiest method to propagate these beautiful flowering shrubs, then follow our article on Growing Hydrangeas from Cuttings!
Since the Victorian Era, Hydrangeas have been believed to symbolize gratitude, love, peace, grace, harmony, and beauty. If you want to easily multiply them to have more in your garden or for gifting purposes, here’s everything you need to know about Growing Hydrangeas from Cuttings.
About Hydrangeas
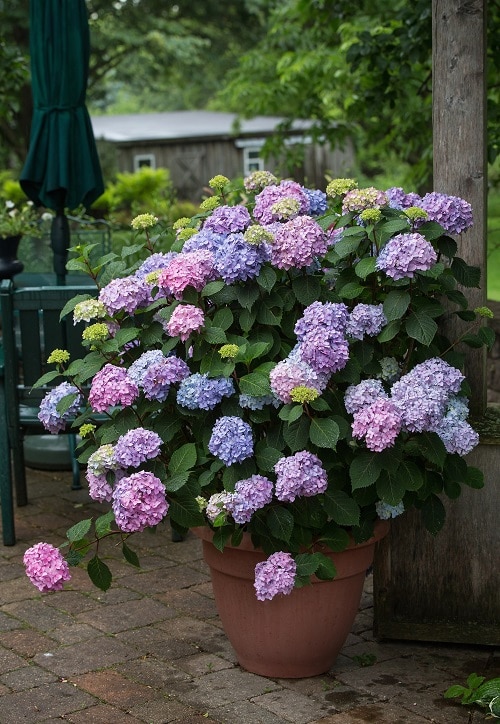
Hydrangeas are a popular flowering shrub found in many gardens. They have clusters of large, showy blooms that come in a variety of colors, including white, blue, pink, purple, and green. The color of a hydrangea’s blooms can be affected by the pH level of the soil they are planted in, which can range from slightly acidic to slightly alkaline.
Hydrangeas are easy to care for and require minimal maintenance. They prefer moist, well-drained soil and thrive in full sun or partial shade. They should be watered regularly, especially during dry periods. Pruning can be done in the spring to shape and control the size of the shrub. Fertilizer should be applied annually in the early spring.
Some Important Points to Consider Before Growing Hydrangeas from Cuttings
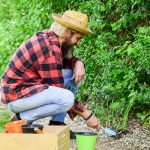
- Water the plant well one day before from which you decide to take the cuttings. Also, make sure that the plant hasn’t dried out two weeks prior to taking the cuttings.
- Always take the cuttings in the early hours of the morning.
- For hydrangeas, mid-spring to early summer is the best time to take the cuttings.
- Always choose semi-hardwood cuttings. Avoid snipping away too soft or hard stems. Also, avoid limping or dull stems and take a cutting from a branch that is not flowering.
- Take several cuttings because if your success rate dips, at least one will survive.
- The best time to propagate hardwood cuttings from hydrangea is late summer or fall. Remember, hardwood cuttings take more time to grow. The method, however, is the same.
Best Growing Medium for Growing Hydrangeas from Cuttings
You can use general potting soil that drains well. Using a mixture of equal parts of perlite, peat moss, and sand will give the cutting a good headstart. If you don’t have peat moss, substitute it by adding cocopeat to the mixture.
Also, avoid using rich potting soil that contains manure, pre-added fertilizer, or compost when growing plants from cuttings.
You can also go for a readymade propagation mix available in the market.
How to Choose the Right Stem for Growing Hydrangeas from Cuttings?
- Choose a stem that is healthy, green, and flexible.
- The stem should have at least two sets of leaves or buds.
- The stem should be at least 6 inches long.
- Look for a stem that has a good amount of white or pink flower buds.
- If available, select a stem with a mature flower head.
- Make sure the stem has a few nodes that are visible along its length.
- Avoid any stems that have obvious signs of disease or damage.
Growing Hydrangeas from Cuttings
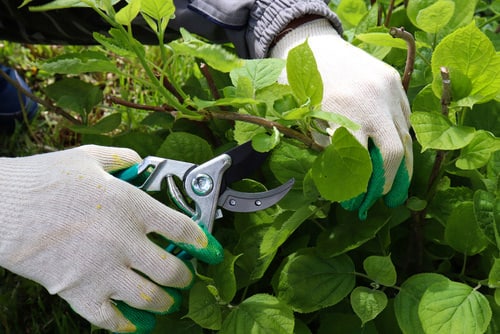
- Make a cut right below the leaf node. The bottom of the cutting should start with a leaf node; this is where the roots will form. If you don’t know what a leaf node is–watch this tutorial video!
- Strip away the bottom leaves, leaving the top ones intact. If there are very large leaves on the top, trim them in half. This is to save the cutting’s energy and to prevent the leaves from touching each other, which causes rot.
- Dip the end, up to 2 inches deep, in a rooting hormone.
- Before potting the cuttings, pre-wet the potting soil so that you don’t wash the rooting hormone on the cuttings.
- Some people use a pen or pencil to make holes for cuttings in the pot; you can use your fingers and bury at least one set of the leaf nodes. Also, plastic pots should be used as they retain moisture well.
- Once done, it’s better to mist water around the cuttings rather than pouring it into the pot. Otherwise, water will disturb the cuttings. Also, don’t overwater just that much to keep the growing medium slightly moist always.
- Cover the pot using a plastic tote (this is optional). It will take around 3-4 weeks for the roots to develop. You can also use a heating mat if you live in a cold climate.
- Do not expose the cuttings to sudden temperature changes and harsh sunlight.
Very soon, your cuttings will start developing new leaves, and once grown a bit, try to pull them gently. If the roots are formed and developed, you will feel some resistance. This is when you can relocate them to individual pots or garden beds.