
Want to Train your Spider Plant to Spill Over like a beautiful fountain? Here are tricks to work its arching foliage to your liking!
The spider plant (Chlorophytum comosum) is known for its ornamental foliage and ease of growth. With slender, long leaves that get long, bushy, and curly naturally, you can train this resilient plant in numerous ways—but our favorite is to let it spill over like a beautiful fountain!
Tricks to Train a Spider Plant to Spill Over
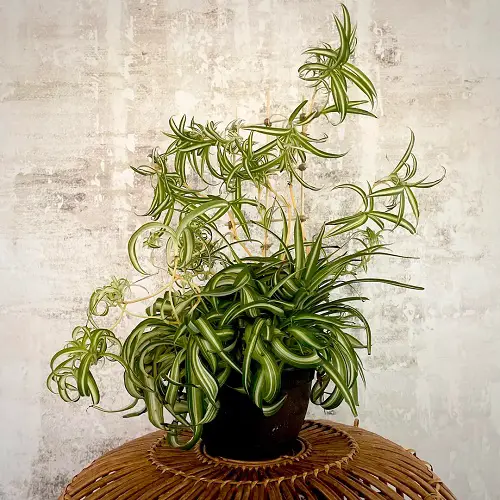
1. Pick a Narrow-Headed Pot
An easy trick to get your spider plant to spill over or cascade is to choose a pot with a narrow head. Once you do that, the long arching leaves will have no choice but to gracefully fall over the edge, giving it a rich, abundant aesthetic.
The depth and volume of the pot also play crucial roles in your plant’s survival rate. Make sure the base is slightly larger than the plant’s root ball for sufficient space to thrive. Over time, the plant will get used to the pot and naturally grow foliage that fountains out.
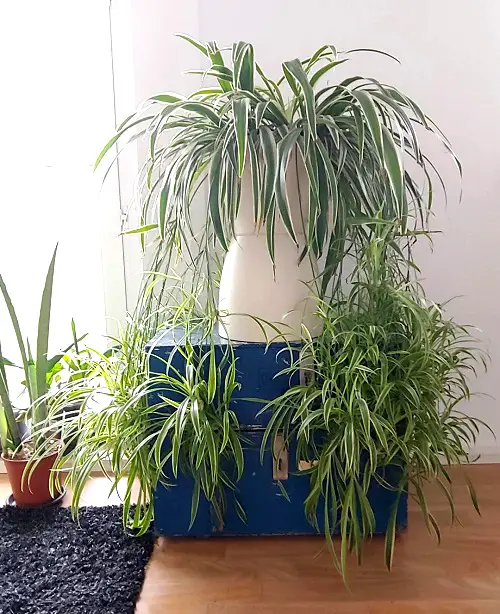
2. Grow Multiple Plants Together
Spider plants take about a year or two to start pushing out spiderettes. If you’re in a hurry, here’s a trick to get the illusion of a bushier spider plant—grow multiple plants at the edge of a large pot!
And in no time, these tiny plantlets all around will produce foliage that will start covering up the pot’s edges, quickly filling up available space while giving the optics of a large spider plant fountain.
Pro Tip: Since multiple plants grow in the same pot, you’ll need to fertilize accordingly, to make sure there’s enough nutrition for all. Use a balanced fertilizer (NPK 20-20-20) diluted to half its strength once a month, and look out for overcrowding.
The lack of space also draws in hiding spots for pests and diseases, so trim the larger leaves growing towards the pot’s center.
3. Tilt it Sideways
Another trick is to use gravity to your advantage, giving you a fascinating way to sweeten the decor and get a spilling spider plant. Once you notice long leaves on your spider plant (about 10-12 inches), it means they’re ready to be trained to spill.
Tilt the pot to force the foliage to fall sideways. You can either buy a tilted pot or add a slight elevation near one edge. Just make sure there are ample drainage holes to prevent waterlogging and root rot.
Note: Since the pot is tilted, water may collect on one side. Punch in drainage holes where it may collect to prevent stagnant water. Also, don’t forget to rotate the pot so the angle shifts, and you get a fuller spider plant; otherwise, it’ll grow more toward the tilted side.
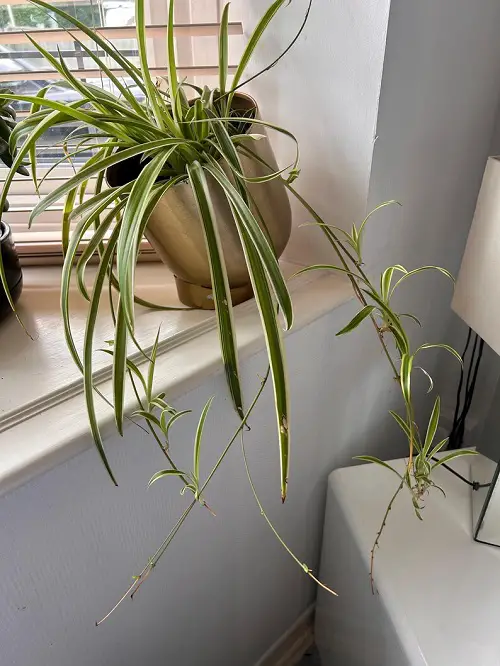
4. Train the Spiderettes
Mature spider plants produce a long stem at the end of which pups emerge. These spiderettes have similar leaves and aerial roots to mature plants. You can train these plantlets using trellises or zip ties to add to the drooping appearance of the entire plant if you want something creative.
If you don’t want your mother spider plant to get messy, allow the spiderettes to grow a bit, and once they’re big enough, snip them away! You can cut spiderettes from a spider plant when they have at least five leaves that are about 2-3 inches long.
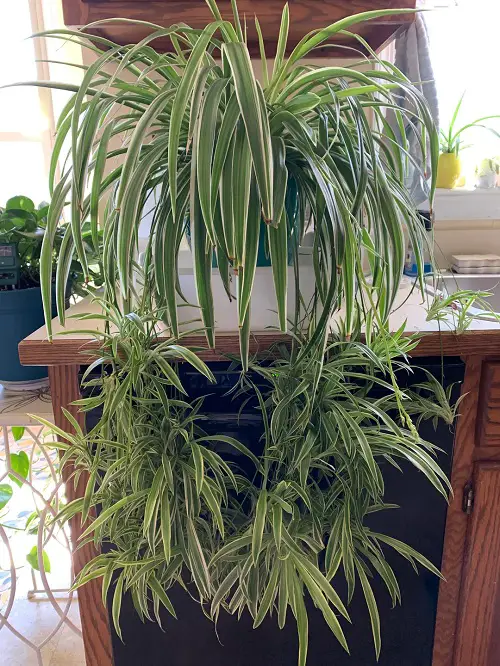
5. Keep Your Pot on a Pedestal (Or Hang It!)
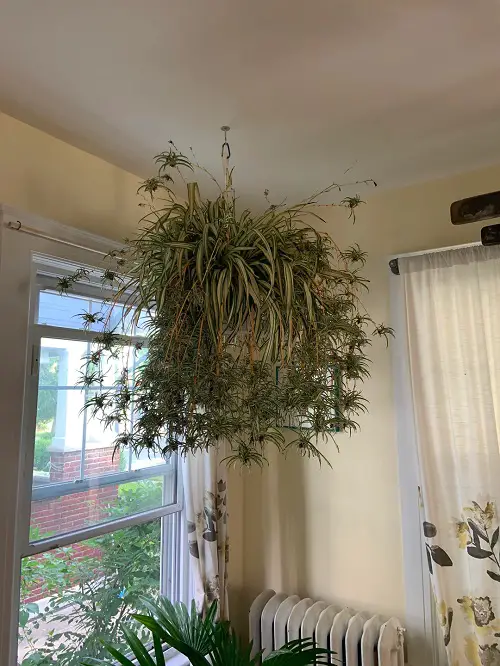
This simple trick of placing your spider plant a little higher than its surroundings will automatically give the leaves a cascading effect. It will also ensure proper air circulation and provide enough space for it to grow fuller and curlier.
You can always stick to the basics and use a hanging basket for spider plants. You can also hang it from a wall hook or a macrame hanger; just position it near a bright, indirect light source.
Well, now that you know these secret tricks, it’s time to put them to use. Do let us know how it goes for you in the comments below. And don’t forget to care for your spider plant if you want the foliage to spill.