
Learn How to Grow Marigold from Cuttings in easy steps for successful propagation and enjoy beautiful blooms in no time.

If you love marigolds and want their flowers all season, it is important to learn How to Grow Marigolds from Cuttings in this article. These are one of the easiest flowers to propagate using this method and also grow in a record less time!
Learn How to Grow Marigolds in Pots here
How to Grow Marigold from Cuttings?
1. Choosing the Right Cuttings
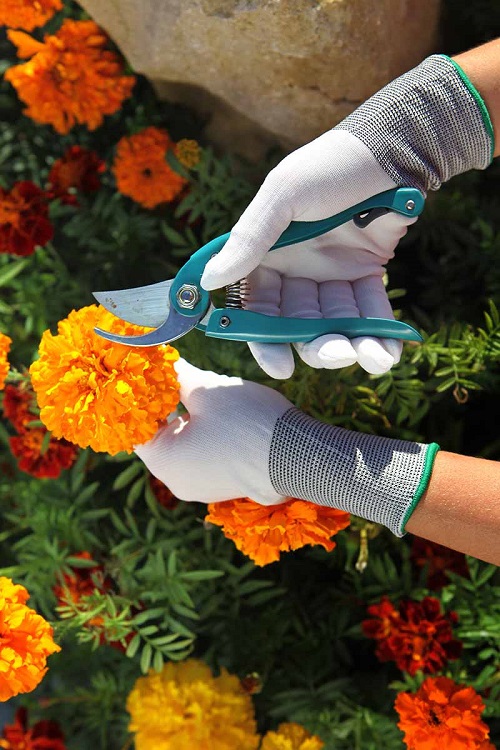
Look for strong, non-flowering stems on the marigold plant. Select the ones that are about 4-6 inches (10-15 cm) long and have several sets of leaves.
Avoid stems that are damaged or weak.
2. Snipping
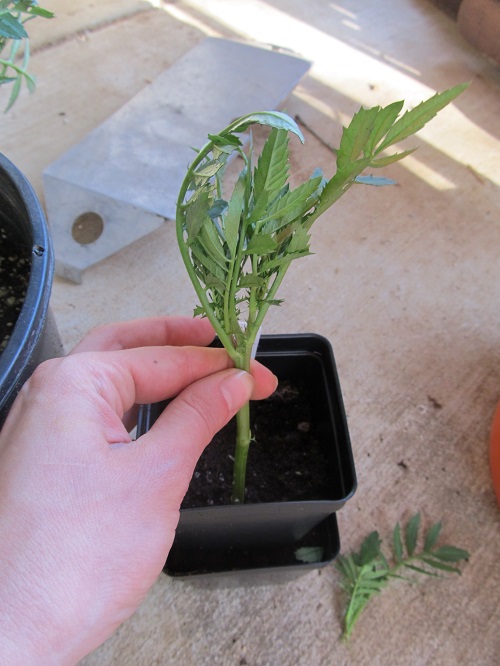
Using shears or scissors, make a clean cut just below a leaf node (the point where a leaf joins the stem). Remove any lower leaves from the stem, leaving only a few sets of leaves at the top.
3. Preparation
If desired, you can dip the cut ends of the stems in a rooting hormone powder or gel. This can help promote root development, although it is optional. Gently tap off any excess rooting hormone.
4. Planting
Make small holes in the potting mix using a pencil or your finger. Insert the lower end of each cutting into a hole, making sure at least one or two nodes are buried in the soil.
Firmly press the soil around the base of the cutting to ensure good contact.
5. Caring
- Place the container in a location that receives bright, indirect sunlight.
- Keep the soil consistently moist but not waterlogged. Water the cuttings whenever the top inch of the soil feels dry.
- Mist the cuttings with water regularly to maintain humidity around the leaves.
- Avoid placing the cuttings in direct sunlight or exposing them to extreme temperatures.
6. Monitoring
Over the next few weeks, monitor the cuttings for signs of new growth. Once you see some new growth, gently tug on the cuttings to check for resistance; if you feel a slight resistance–it means roots are developed.
Once roots have formed, you can transplant the cuttings into individual pots or into a garden bed.
Read about Marigold Benefits in the Garden here
Best Time for Growing Marigolds from Cuttings
Marigolds are warm-season annuals that thrive in full sunlight and require warm soil temperatures to establish successfully. You can plant marigolds anytime once all the dangers of frost are passed but ideally you should start early for a longer display of flowers as suggested below:
- Northern United States (Zone 4-6): In the northern regions, where the growing season is shorter, it’s best to start marigold cuttings indoors about 6-8 weeks before the last expected frost date. This will give the plants a head start and allow them to be transplanted outdoors after the danger of frost has passed in spring or early summer. You can start cuttings anytime in summer as well!
- Central United States (Zone 7-8): In the central regions, where the climate is moderate, starting them indoors about 4-6 weeks before the last frost date can give them a boost, but they can also be directly planted in spring once the soil has warmed up and you can continue doing this till early fall.
-
Southern United States (Zone 9-11): In the southern regions with milder winters, marigold cuttings can be started almost year-round except for when the weather is very harsh. They can also be planted in the fall for a winter display, as the temperatures remain relatively warm.
It’s important to note that marigolds are frost-sensitive, so make sure to time your planting after the risk of frost has passed. Additionally, monitor local weather conditions and follow the specific guidelines for your USDA hardiness zone.
Best Potting Mix for Growing Marigolds from Cuttings
If you prefer to make your own potting mix for growing marigolds from cuttings, you can create a homemade mix that provides good drainage, moisture retention, and nutrient availability. Here’s a recipe for a homemade potting mix suitable for growing marigolds from cuttings:
- 1 part peat moss or coconut coir
- 1 part perlite or vermiculite, or coarse sand
- 1 part potting soil (optional, if desired)
Hardening Off Cuttings and Transplanting
- Before transplanting the rooted cuttings into the garden, gradually expose them to outdoor conditions over a week or two. This process is known as hardening and helps acclimate the plants to their new environment.
- Choose a sunny spot in the garden with well-draining soil.
- Make tiny holes that are slightly larger than the root ball of each cutting.
- Gently place the rooted cuttings into the holes, ensuring they are at the same depth as they were in the container.
- Backfill the soil around the roots, firming around gently.
- Mist the newly transplanted cuttings thoroughly and keep the soil consistently moist until they establish themselves.
Learn Why Should You Grow Marigolds in Vegetable Garden here