Peace Lily Propagation is not difficult if you know the right way to do it. Let’s learn all about How to Propagate Peace Lily at home!

If you want to multiply the Spathiphyllum at home, then it is essential to know the steps involved in Peace Lily Propagation. To help you out, check out our step-by-step guide on How to Propagate Peace Lily.
Learn how to get peace lilies to bloom here
Best Time to Propagate Peace Lily

If you live in a cold region, spring or summer is the best time to propagate peace lily. For warm tropical and subtropical areas, you can clone this plant at any time of the year but be careful in winter. Make sure you start the process when the daytime temperature is warm and around or above 65 F (18 C).
How to Propagate Peace Lily

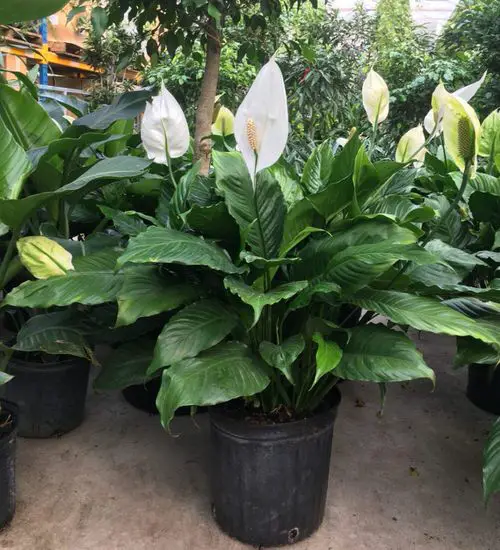
Before you plan to multiply peace lily, understand the fact that these plants cannot be grown from stem or leaf cuttings. The perfect way to successfully propagate them is via division. Also, when you do that, look for the signs like the plant getting overcrowded in the pot or growing too many clumps. Identifying this will make the process easy!
Before you start, make sure the plant is in healthy condition and not under stress. Also, water the plant thoroughly an hour or two before beginning the steps suggested below:
1. Dividing the Clumps
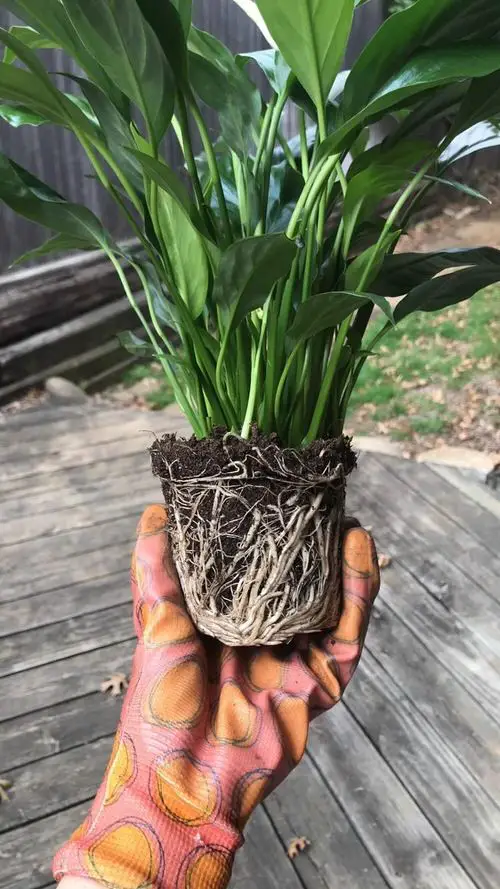
Select a healthy plant and carefully take it out from the pot by loosening the soil. Remember that pulling the plant harshly can damage the roots, so you must do it gently by tapping around.
Once out, work with a clean and sanitized knife, cut through the rootball to create sections, and separate the clumps with connecting roots a little aggressively without damaging any part of the plant. If it takes time, you may have to use pruning shears as well to cut some stubborn roots.
Note: Make sure there’s a part of the root attached to each one of the clumps.
2. Potting
Take a 6-8 inches pot, fill this half with a fresh potting mix and then hold the individual clump (plant) in the upright position in the middle and surround it with more potting mix again. Do not plant more than one or two clumps in a single pot.
3. Taking Care
After planting, water the growing medium-well and tap gently to prevent the settling of the soil. You can also use a spray bottle to mist it evenly. Keep the pot where it gets plenty of bright but indirect light. Avoid exposing it to direct sun. Also, ensure it is not exposed to sudden temperature fluctuations while it is establishing.
Find the common peace lily growing problems and their solutions here
Growing Peace Lily In Water

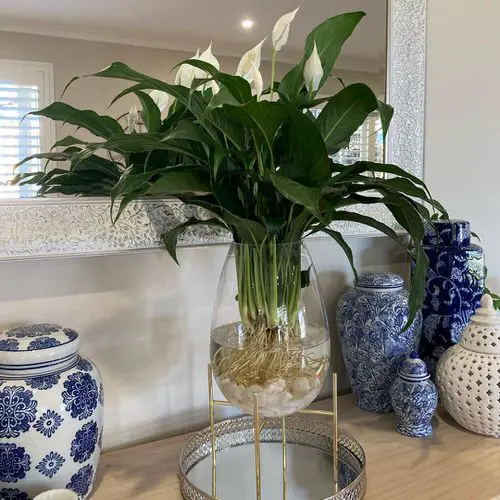
You can also grow a peace lily in water–the process of separating the clumps is the same as listed above. Just make sure to change the water once every 4-6 days and provide it with plenty of indirect light. Throw a pinch of balanced liquid fertilizer once every two weeks in the water for growth.
Discover more houseplants you can grow in the water here
- Use distilled or RO water. If you are using regular tap water, allow it to sit overnight for the chlorine, calcium, or other minerals to settle down.
- Rinse and clean the vase or bowl once in 15 days.
- It is good to use a transparent vessel as it will allow you to keep a tab on the condition of roots and water.
Growing Peace Lily From Seeds
Growing peace lily from seeds can be tricky and will take an awful lot of time.
Plant the seeds half an inch deep in a pot filled with well-draining soil. Mist well and make sure they get bright but indirect light. Cover the container with a plastic bag for good humidity. The germination will take place in 14-25 days.
However, after the seeds germinate, they will take their own sweet time to become a plant, which can be long. This is why the quickest and better way to propagate peace lily is to divide the existing plant.


Thanks for sharing this. I’m going to try it both ways, potting soil, and vase of water.
Hi, first of all beautiful plant 🌿 Second, where did you get the vase and stand, gorgeous. Thank you