
Do you know Why Growing Sweet Potatoes in Sacks and Bags Is the Best Idea? We’ll tell you exactly why and how below!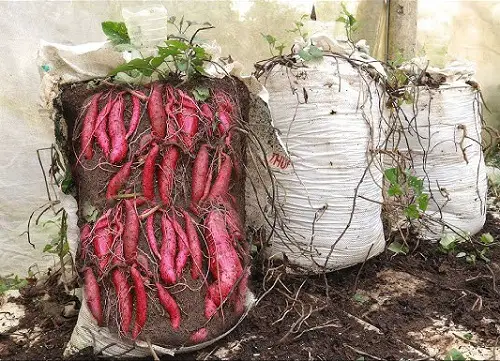
Growing sweet potatoes in sacks and bags is a super easy and successful way to bring homegrown goodness to your table. From saving space to getting bigger tubers, this method is about to become your new favorite gardening trick. Let’s dig in!
Why is Growing Sweet Potatoes in Sacks and Bags the Best Idea?
Sacks and bags are surprisingly the perfect way to grow sweet potatoes. They’re cheap, easy to manage, take up minimal space, can be moved, and can even lead to bigger, tastier sweet potatoes because growing in them makes the process of hilling easier. Plus, you control the soil quality, making it ideal for these tasty tubers. Pretty neat, huh?
How to Grow Sweet Potatoes in Sacks and Bags
1. Gather All the Things
The first thing you need is the bags. So, what kind of bags are we talking about?
- Grow Bags: These are fabric pots specifically designed for container gardening. They come in various sizes, but a 10-15-gallon bag is a good size for sweet potatoes.
- Burlap Sacks: These are budget-friendly options. Just make sure the sack is well-ventilated and has good drainage. You may cut out some holes at the bottom of these sacks to allow excess water to drain out.
Coming to the material, both burlap fabrics and plastic tarps work fine. There’s no difference in growth, and you can clean both of these easily to get the bag ready for the next season.
Another cheap and durable option is used polypropylene (PP) bags. You plant your sweet potatoes in them after washing and rinsing thoroughly in water.
The other thing you need is sweet potato slips. These are young sweet potato sprouts or plants that you can grow yourself from a store-bought sweet potato or buy from a nearby garden center.
Getting Slips from Sweet Potatoes at Home
You can also use sweet potatoes from your kitchen to grow slips for your sack. However, for this purpose, buy from a farmer’s market or organic sweet potatoes, as they won’t be treated with growth retardants to increase shelf life.
They have little bumps on their skin called “eyes,” and they’ll sprout into leafy shoots perfect for planting. Here’s what to do.
- Pick a firm sweet potato without moldy spots and fill a small pot with some potting mix. A 3-4 inch deep and wide pot would do.
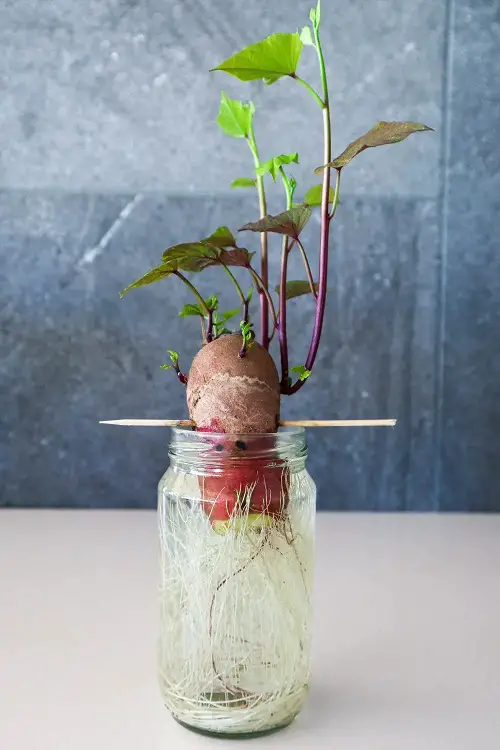
- Now, place the sweet potato in the pot. The bottom half will grow roots, and the upper one will sprout slips, so make sure you keep the rounder end above the soil and push the pointier one down and inside.
- You can also do the same thing in water, as shown in the picture above. The pointed side should be touching the water, and it has to be changed every 2-3 days.
- Now moisten the soil in the pot and keep it in a warm and bright place. In about a month, you will notice many shoots growing from it. These will be your slips!
Once the shoots are about 5-6 inches tall and have a few leaves, it’s time to remove them from the sweet potato’s body gently. You can twist them off carefully or cut them with a sharp knife. Once you have them, you can use them to grow your own sweet potatoes by following the steps shared below.
Using Sweet Potato Cuttings
Growing sweet potatoes from vine cuttings is also possible, but it’s not as straightforward as the previous one.
- Look for a healthy vine with a few nodes (the bumpy bits where leaves grow).
- Cut the vine into sections, each with at least 2 nodes. Make the cuts just below a node on one end and just above a node on the other end. You can remove the bottom leaves if they’re large.
That’s pretty much it. You can use these cuttings and plant them in the sacks to grow your own sweet potatoes.
2. Prepare the Soil

Sweet potatoes prefer loose, well-draining potting mix. You can use a bagged potting mix specific to vegetables, or you can make your own by mixing equal parts compost, garden soil, and perlite.
While you’re at it, add some granulated fertilizer in a meager amount, but choose one with low nitrogen. Go with a 5-10-10 NPK ratio, as it’s low in nitrogen with sufficient amounts of phosphorous and potassium. This will help the sweet potatoes grow big and tasty underground instead of just leafy on top.
3. Fill Up the Sacks
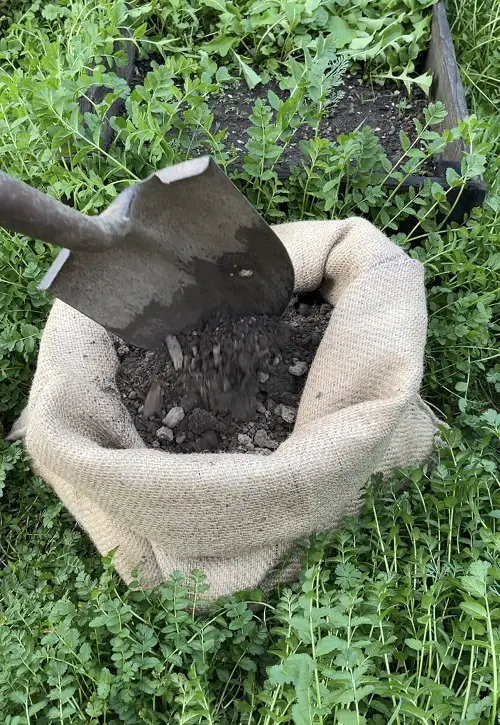
Before doing this, ensure your sacks have holes in the bottom to let the excess water drain. If not, when waterlogged, your sweet potatoes will likely rot.
Now, use your potting mix recipe to fill the sacks only up to two-thirds full. You can later roll up the leftover sack for hilling. And don’t pack it too tight—sweet potatoes like their roots to breathe.
4. Planting the Sweet Potato Slips or Cuttings
Sweet potatoes are heat-lovers and need warm soil to thrive. Plant them when the soil temperature reaches at least 50 F (15 C).
The best time to plant them is when all the dangers of frost would have passed. In simple words, it is anywhere between March and June, depending on your local weather.
If you live in a hotter, frost-free climate (USDA Zones 10, 11), you can plant again after the end of summer or in early fall.
While sweet potatoes need hot and humid conditions to thrive, in the initial stage, plant on a cloudy day or in the evening to avoid burning them.
- Poke a few holes about 3-4 inches deep in the potting mix, spacing them evenly around the sack.
- Push the stem of the slip down into one of the holes, making sure at least 2-3 sets of leaves are above the soil surface. Gently but firmly pack the potting mix around the base of the slip to secure it.
Repeat this process for all your remaining slips, leaving at least 10-inch gaps between each plant. Water the sack deeply until water runs out the drainage holes, then place it in a sunny location that gets at least 6-8 hours of sunlight daily.
Pro Tip: You can also use the bag sideways–this will give you space to grow more sweet potatoes in a sack.
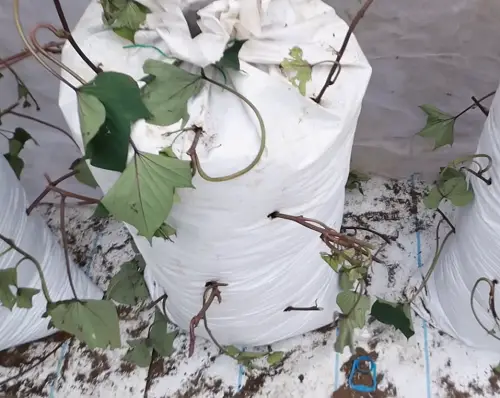
Using Cuttings
Do the same with cuttings. Just create a hole in the mix for each cutting, or another way is to cut smaller holes around the sides of the bag and plant your cuttings in them (as shown in the picture), deep enough so the node is buried.
After that, you just have to water it and place the sack somewhere warm and partly sunny. Once the cuttings are established, transfer them to a sunnier spot.
5. Care for Sweet Potatoes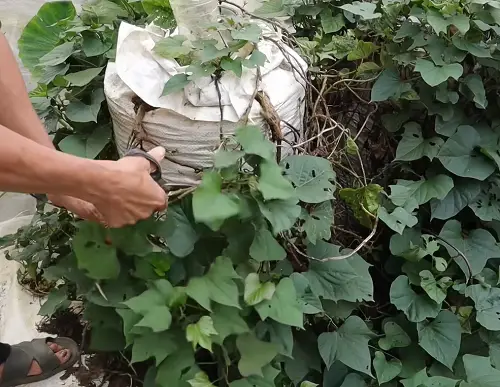
All that’s left now is to care for the sweet potatoes in sacks. Initially, water consistently so the soil stays moist. But once you notice the vines growing well, reduce the watering a bit. At this point, the roots become susceptible to rot.
Let them grow, and in about 90-120 days, you’ll have crunchy and tasty sweet potatoes ready to harvest.
Harvesting Sweet Potatoes from the Sack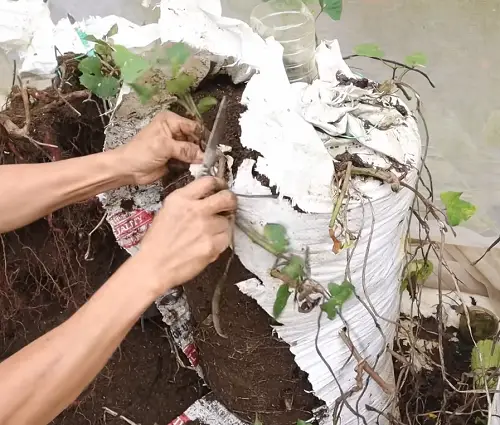
First, cut back the long vines with some shears. Then, gently dig around the base of the plant in the sack. You don’t need to go too deep; sweet potatoes grow upwards from the roots. Use your hands to feel the potatoes and pull them out carefully.
Be gentle to avoid bruising them. And if you’re growing them sideways, tear apart the bags.
Preparing the Sack for the Next Planting
Once you have harvested your sweet potatoes, you will need to get the sack ready for the next planting.
First, empty and spread the old soil on a tarp or baking sheet, let it dry out completely, and bake it in the sun. This will help kill any pests or diseases. Once dry, you can mix half of the old soil with fresh potting mix for the next planting.
Give the sack a quick rinse to remove any leftover dirt. Check for any tears or holes and patch them up if needed. Now, refill the sack with soil and plant the sweet potato slips once again.
Additional Tips
- While everyone knows sweet potatoes love the sun, did you know they can get sunburned? Consider covering your sack with a light cloth during the hottest part of the afternoon, especially when growing in hot climates.
- You don’t have to buy special sweet potato slips (sprouts) to get started. An organic sweet potato from the grocery store works well.
- Once your sweet potato vines get nice and long, try gently layering some of the vines on top of the soil in your sack. Weigh it down a bit with some more soil, and you might just get bonus sweet potatoes growing right off the vine! Remember that rolling up the sack tip for hilling above?